• Skip to primary navigation
  • Skip to main content
  • Skip to primary sidebar
  • Skip to footer

iBiology

Bringing the World's Best Biology to You

  • Start Here
    • Explore iBiology
    • All Playlists
    • All Speakers
    • All Talks
    • What’s new at iBiology?
  • Research Talks
    • Talks by Topic
      • Biochemistry
      • Bioengineering
      • Biophysics
      • Cell Biology
      • Development and Stem Cells
      • Ecology
      • Evolution
      • Genetics and Gene Regulation
      • Human Disease
      • Immunology
      • Microbiology
      • Neuroscience
      • Plant Biology
      • Techniques
      • Archive
    • Talks by Series
      • Bench to Bedside
      • Famous Discoveries
      • Great Unanswered Questions
      • Microscopy Series
      • Share Your Research Series
  • Stories
    • Background to Breakthrough
    • Interviews and Profiles
    • Science and Society
  • Courses
  • Careers
    • Professional Development Talks
    • Professional Development Courses
    • Career Exploration
    • NRMN Resources
    • Biomedical Workforce
  • Educators
  • About
    • Mission
    • Commitment to Inclusion
    • iBiology Team
    • Board of Directors
    • iBiology Funders and Partnerships
    • Contact Us
  • Donate
Home » » Phase, Polarization, and DIC Microscopy Lab

Phase, Polarization, and DIC Microscopy Lab

  • Duration: 12:39
  • Downloads
    • Hi-Res
    • Low-Res
  • Subtitles
    • English
  • Transcript

00:00:11.17 Hello, I'm Steve Ross, general manager of product and marketing
00:00:15.25 for Nikon. And today, what we're going to do is follow-up on
00:00:19.29 some of the previous lectures, specifically on polarized light,
00:00:25.14 differential interference contrast or DIC, and phase contrast.
00:00:29.23 And what I'd like to do is give more of a practical view of how
00:00:35.29 you actually get these techniques to actually work on the microscope,
00:00:38.29 and what are the components, and how you would adjust them and
00:00:42.07 troubleshoot them to get the techniques implemented for
00:00:48.00 practical applications. So two of the critical components, we're
00:00:53.22 going to start with polarized light in a very simple way. Polarized
00:00:58.18 light, as it relates to differential interference contrast or DIC.
00:01:02.00 We have what's called a polarizer and an analyzer, which is basically another
00:01:07.28 polarizer, that when you cross these two, you can actually see
00:01:12.12 that you get to a point of extinction, where the light is no longer
00:01:18.11 coming through, and you've extinguished the light through cross
00:01:23.04 polars. And as you rotate off extinction, you can see the light coming through.
00:01:28.05 So, where these components sit on the microscope is with the
00:01:33.23 polarizer in the light path here, in the transmitted light path which we've
00:01:38.16 covered in previous lectures. And the analyzer, or second polarizer, sits in
00:01:50.25 the microscope, actually goes into our fluorescence filter turret.
00:01:55.12 It clicks in place, then two clicks to the left, and it is in our light
00:02:02.26 path. And the analyzer sitting in the microscope, actually in the fluorescence
00:02:10.08 filter turret so you can do multidimensional imaging and switch between
00:02:13.03 DIC and fluorescence imaging. So now we have these two polarizers in place.
00:02:19.08 And what I want to do first is look at simple polarized light.
00:02:22.10 So now, if we put the polarizer in the microscope with the
00:02:28.04 analyzer, you can see now through the eyepieces on the camera,
00:02:33.06 because we have an eyepiece camera here, that we can move
00:02:37.02 closer and closer to extinction. And when we reach extinction,
00:02:40.19 the light is completely attenuated, and you have a blurred black background
00:02:43.27 on the camera. So you have light coming through, and as you're
00:02:49.00 moving towards extinction, you get to a point where you have completely
00:02:53.05 crossed polars. And the way you're going to adjust this in the lab,
00:02:56.12 in older DIC systems, some people would like to look at what
00:03:00.05 they called the Maltese cross in the back of the aperture of the
00:03:04.03 microscope. But nowadays, many new DIC systems don't allow
00:03:08.25 you to do that, due to the construction of the system. And the
00:03:12.27 eye is very sensitive to light and dark, so the best thing to do
00:03:16.27 is to adjust your polarizer crossed with your analyzer, such that
00:03:22.05 you get the darkest background. That's how you know you're at extinction.
00:03:25.19 And that's what we've achieved here. We have a very black
00:03:27.27 background, and now when I put a specimen in place, that's
00:03:32.14 sensitive to polarized light. You can see, like these paper fibers,
00:03:38.27 these nice interference colors that are generated from the
00:03:43.08 phase shift of the polarized light. Because all of the wave forms
00:03:48.07 are going in the same direction. And if you can see as we go
00:03:55.00 off extinction or we vary the amount of extinction, you can see the
00:03:59.23 colors shifting on the camera. So that's the first step in differential
00:04:04.18 interference contrast. Following that, you want to make sure you have
00:04:08.14 two other components in place that are your Nomarski prisms,
00:04:15.19 this is actually a modified version of a Nomarski prism.
00:04:19.11 It's two quartz wedges that are cut at a certain sheer thickness,
00:04:25.08 or angle, that allows you to basically tailor the distance
00:04:32.19 between the two rays going through your specimen, such that
00:04:35.21 they are either further apart, giving you more contrast, or closer
00:04:39.13 together, giving you more resolution. And we make several different
00:04:43.13 types of those for the microscopes, depending on where you want
00:04:46.17 that tradeoff to be. And this prism slides into the, what's called the
00:04:52.08 nosepiece, or the objective turret, right underneath the objective lens.
00:04:56.01 Like so. So you have one prism here, another prism below the objective,
00:05:02.04 polarized light, and that's really all the components you need for
00:05:06.21 DIC. So once you know that you have extinction, you can put
00:05:11.13 your prisms in place. And now we'll switch specimens to a
00:05:16.11 cheek cell preparation, which will give us a nice specimen
00:05:21.01 to see the DIC working. So now you can see these cells in
00:05:29.01 DIC on the camera, and you can see the nucleus, and
00:05:32.27 you can see sort of a 3 dimensionality. If you're at extinction,
00:05:37.24 you really don't get much of an image, but what you need to do is
00:05:40.28 move the polarizer slightly off extinction, and now you can see
00:05:46.17 on the camera that you get this nice 3 dimensional look of the cells.
00:05:50.16 Now the other thing that's important to notice is when you're going
00:05:58.23 on the other side of extinction, you actually change the directionality
00:06:02.13 or the shadowing of the DIC image. So you can see the shadow
00:06:06.26 on one side, and going through extinction to the other side, the shadow
00:06:11.15 flips orientation. It looks like the light is coming from the other direction.
00:06:15.17 In DIC, it's actually very important if you're looking for contrast that you
00:06:20.09 orient your specimen to enhance the contrast of the structures you're
00:06:25.26 interested in. Because you only have the contrast in one orientation
00:06:30.02 in differential interference contrast. So now we're going to switch to
00:06:35.26 phase contrast on a microscope. And because this is a universal
00:06:40.29 condensing system, we're able to do that with the same components,
00:06:45.21 without switching out the condenser. What we'll want to do is
00:06:48.11 pull out our polarizer and remove our analyzer, and now I wanna go
00:06:56.25 through phase contrast and how to adjust it. So let me just put in
00:07:00.02 a phase contrast lens in place. And remove our upper prism.
00:07:09.08 And place in now a phase ring. Now you can see a very different
00:07:21.19 image on the camera. This is the same cell with the nucleus,
00:07:26.18 but now what you're seeing is that the phase image is very
00:07:32.22 contrast-y. It doesn't look very 3 dimensional, but it gives you very
00:07:37.14 nice contrast of light and dark. It's almost a binary image, and
00:07:43.00 some people prefer phase contrast because it doesn't have intensity
00:07:47.03 gradients like DIC, that gives you that 3 dimensional image
00:07:51.07 but the high contrast and almost binary look of it, white and black,
00:07:55.23 allows you to quantify things better than you can when you have a gradient
00:08:01.04 of intensities. So now, what I'd like to do is talk about how you
00:08:06.19 align phase contrast. So when we talk about phase contrast,
00:08:10.13 we know that you have a phase ring made of a quarter wave
00:08:15.25 plate, a neutral density material, inside the objective lens. If you look
00:08:20.17 on the back aperture of the phase contrast objective, you can
00:08:23.26 actually see that phase ring, which again is the ring of neutral
00:08:26.27 density material and quarter wave plate that works to attenuate
00:08:30.00 the zero order light, which is basically your background, knocks
00:08:33.09 down the intensity of that, and then causes a phase shift of
00:08:37.10 non-diffracted light relative to the diffracted light coming through
00:08:40.19 the microscope. And that's gonna enhance the contrast, giving
00:08:43.29 us a maximal contrast. And you can see those letters are
00:08:48.19 in green, rather than in black, on the standard objective. And it tells you
00:08:52.19 also what phase ring to use, in this case a phase 2 ring.
00:08:56.05 And shows you that this is DLL phase, or dark light light.
00:09:02.14 As we talked about during the phase lecture, there are many
00:09:05.04 different variants on phase contrast and that's one.
00:09:09.04 You also have a phase annulus that's in this condensing
00:09:13.24 system right here, there's your phase annulus. So you can
00:09:17.27 see right through it, it's basically just restricting the annules of
00:09:21.26 illumination in the microscope system. So that's basically all we're
00:09:26.17 doing, we're restricting those annules of illumination and then overlaying
00:09:30.11 in a conjugate aperture plane, the phase ring with this annulus.
00:09:35.23 Okay, so there are two adjustments that move this annulus
00:09:40.27 in two axes. So you can move it around to align it in the
00:09:46.12 condensing system. The phase annulus restricts all of the
00:09:51.08 illumination to a specific area, making the light that's coming through your
00:09:56.06 zero order light hit specifically on that ring on the objective lens.
00:10:01.04 So it's very important that that annulus and that ring in the objective
00:10:04.25 lens be aligned as it is right now. And if we switch to that camera
00:10:10.07 again, you can see that looking at the back aperture. Here's
00:10:14.13 our ring of illumination, and what you can see now is that if
00:10:19.11 I move this phase annulus, you can see this ring in the objective
00:10:23.27 lens behind it. Now that these are off alignment with one another,
00:10:30.25 if I move back to the image, you really can't see any contrast
00:10:34.01 in the image of the cell. Now as I move that annulus back,
00:10:39.06 you start to see that contrast returning. And when you hit
00:10:44.09 perfect alignment, you see really nice contrast in the cells.
00:10:48.11 And let's just see what that looks like at the back aperture
00:10:52.03 again. We're moving that phase relative to the annulus, actually
00:10:57.13 the annulus relative to the ring, we're moving that annulus back
00:11:00.21 and once they're perfectly overlapping, we get that nice
00:11:07.13 high contrast phase image. Normally, a system will have two
00:11:13.23 axes of adjustment, and in this case, the adjustments are right
00:11:20.28 in the front. Depending on your microscope, they can be in different
00:11:24.07 locations. And often, when you do your Kohler illumination,
00:11:28.01 you may not just be in one axis, you may just have to move this
00:11:32.02 in a couple of different axes. Very much like when you're adjusting
00:11:35.11 the condenser for Kohler illumination. So again that's really
00:11:43.09 all there is to phase contrast. If it's not working, generally
00:11:47.10 it's a simple alignment issue. The other thing that would be obvious
00:11:51.15 to the back aperture if the system's not working, is the annuli has
00:11:56.10 to be specifically sized to match that objective lens and condensing system.
00:12:02.10 So if it's not working and you have the components, there either
00:12:06.22 out of alignment, or you have a mismatch between the size
00:12:10.24 of the phase ring and the phase annulus, okay? Thank you.

This Talk
Speaker: Steve Ross
Audience:
  • Researcher
Recorded: January 2013
More Talks in Microscopy Series
  • Introduction to Fluorescence Microscopy
  • Timothy Mitchison Fluorescent Probes.jpg
    Fluorescent Probes: Organic Dyes and Quantum Dots
  • Roger Tsien: Fluorescent Proteins
    Fluorescent Proteins and the Story Behind GFP
All Talks in Microscopy Series
Share

Talk Overview

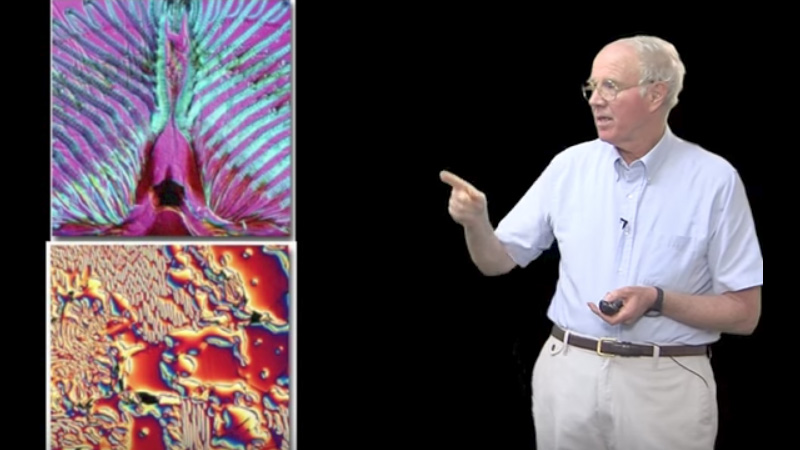
Steve Ross illustrates the components in the optical light path and how they need to be aligned to achieve proper 1) phase microscopy, 2) polarization microscopy, and 3) DIC microscopy.

Speaker Bio

Steve Ross

Steve Ross

Stephen Ross is the General Manager of Product and Marketing at Nikon Instruments.  He is also very involved in teaching microscopy at the Marine Biological Laboratory in Woods Hole and at the Bangalore Microscopy Course at the National Centre for Biological Sciences. Continue Reading

Playlist: Microscopy Series

  • Microscopy Edward Salmon
    Pragmatics of DIC and Video-Enhanced Contrast Microscopy
  • Introduction to Fluorescence Microscopy
  • Timothy Mitchison Fluorescent Probes.jpg
    Fluorescent Probes: Organic Dyes and Quantum Dots
  • Roger Tsien: Fluorescent Proteins
    Fluorescent Proteins and the Story Behind GFP

Reader Interactions

Leave a Reply Cancel reply

Your email address will not be published. Required fields are marked *

Primary Sidebar

Sign up for the Science Communication Lab education newsletter

  • Sign up Newsletter
  • This field is for validation purposes and should be left unchanged.

Privacy Policy

Help us keep bringing the world’s best biology to you!

Footer

Funders

NSF
NIGMS
Lasker
Rita Allen

Start Here

  • Talks for Everyone
  • Talks for Students
  • Talks for Research
  • Talks for Educators

Explore

  • Explore
  • All Playlists
  • All Speakers
  • All Talks

Talks By Topic

  • Biochemistry
  • Bioengineering
  • Biophysics
  • Cell Biology
  • Development and Stem Cells
  • Ecology
  • Genetics and Gene Regulation
  • Human Disease
  • Immunology
  • Microbiology
  • Neuroscience
  • Plant Biology
  • Techniques

Talks by Series

  • Bench to Bedside
  • Famous Discoveries
  • Great Questions
  • Share Your Research Series

Career

  • Professional Development
  • Career Exploration
  • NRMN Resources
  • Biomedical Workforce

Courses

  • Microscopy Series
  • Short Microscopy Series
  • Open edX Courses
  • Cell Biology Flipped Course
  • Engineering Life Flipped Course
  • Evolution Flipped Course

Educator

  • Educator Registration
  • Educator Resources
  • Log In

About Us

  • About Us
  • iBiology Team
  • Wonder Collaborative
  • Contact Us
  • Mission
  • Privacy Policy
  • SCL Financial Conflict of Interest Policy

This material is based upon work supported by the National Science Foundation and the National Institute of General Medical Sciences under Grant No. 2122350 and 1 R25 GM139147. Any opinion, finding, conclusion, or recommendation expressed in these videos are solely those of the speakers and do not necessarily represent the views of the Science Communication Lab/iBiology, the National Science Foundation, the National Institutes of Health, or other Science Communication Lab funders.

© 2023 - 2006 iBiology · All content under CC BY-NC-ND 3.0 license · Privacy Policy · Terms of Use · Usage Policy
 

Power by iBiology