• Skip to primary navigation
  • Skip to main content
  • Skip to primary sidebar
  • Skip to footer

iBiology

Bringing the World's Best Biology to You

  • Start Here
    • Explore iBiology
    • All Playlists
    • All Speakers
    • All Talks
    • What’s new at iBiology?
  • Research Talks
    • Talks by Topic
      • Biochemistry
      • Bioengineering
      • Biophysics
      • Cell Biology
      • Development and Stem Cells
      • Ecology
      • Evolution
      • Genetics and Gene Regulation
      • Human Disease
      • Immunology
      • Microbiology
      • Neuroscience
      • Plant Biology
      • Techniques
      • Archive
    • Talks by Series
      • Bench to Bedside
      • Famous Discoveries
      • Great Unanswered Questions
      • Microscopy Series
      • Share Your Research Series
  • Stories
    • Background to Breakthrough
    • Interviews and Profiles
    • Science and Society
  • Courses
  • Careers
    • Professional Development Talks
    • Professional Development Courses
    • Career Exploration
    • NRMN Resources
    • Biomedical Workforce
  • Educators
  • About
    • Mission
    • iBiology Team
    • Board of Directors
    • iBiology Funders and Partnerships
    • Contact Us
  • Donate
Home » Courses » Microscopy Series » Contrast Generation for Transmitted Light

Pragmatics of DIC and Video-Enhanced Contrast Microscopy

  • Duration: 26:14
  • Downloads
    • Hi-Res
    • Low-Res
  • Subtitles
    • English
  • Transcript

00:00:12.00 Hi. I'm Ted Salmon,
00:00:13.27 and I want to talk here about high resolution video
00:00:16.09 or digitally enhanced DIC microscopy.
00:00:19.20 This is the second talk in a series on DIC microscopy.
00:00:23.20 In a previous lecture, I talked about
00:00:26.14 the principles of DIC microscopy
00:00:29.16 and image contrast generation in the DIC microscopes.
00:00:34.10 Now, a few words about alignment for DIC.
00:00:39.06 To set up the microscope for each objective and condenser situation,
00:00:43.06 you're gonna set up for Koehler illumination,
00:00:45.27 and usually you start with a low-power objective
00:00:49.05 on the specimen
00:00:51.19 and then work your way up to the higher power objectives.
00:00:53.25 Right?
00:00:56.11 And second, you're gonna also align the microscope
00:00:59.04 for polarization microscopy,
00:01:00.25 which means in the beginning you're gonna take out the objectives,
00:01:03.21 the condenser, the DIC prisms, alright?,
00:01:07.24 and you're gonna make sure that the polarizer
00:01:10.18 is aligned in an East-West direction.
00:01:13.09 There's usually a little double arrow on the polarizer
00:01:16.06 that tells you that...
00:01:18.14 the vibration direction for the polarizer.
00:01:21.14 And then you're gonna align the analyzer
00:01:24.13 up in the North-South direction,
00:01:26.04 but what you wanna do is to look down the microscope
00:01:29.29 and rotate the analyzer, if you can,
00:01:32.11 and make sure that it makes a maximally dark image.
00:01:34.21 That's called extinction.
00:01:36.18 Alright?
00:01:38.11 And usually the manufacturers, particularly today,
00:01:40.23 are really good about this,
00:01:42.16 and they've already pre-aligned all these things,
00:01:45.11 and you slip them in there, and you'll get it.
00:01:47.10 But jiggle the analyzer a little bit or what have you...
00:01:49.20 just ma... or the... rotate the polarizer a little bit
00:01:52.09 and make sure the two of them are crossed.
00:01:54.10 Because if they're uncrossed at all,
00:01:56.05 that represents noise coming through the system
00:01:59.21 and prevents you from seeing the weakest intensity sort of
00:02:04.27 specimen detail, right?
00:02:06.07 So, the other thing that's really important,
00:02:10.09 just like you would have...
00:02:12.19 do for phase contrast is you have to use
00:02:15.19 the correct objective and condenser DIC prisms.
00:02:18.00 So, the objectives...
00:02:19.28 there are different schemes that different manufacturers have,
00:02:23.00 but nonetheless,
00:02:25.03 they will tell you which prisms should be used
00:02:28.15 for a specific kind of objective
00:02:30.12 and which DIC prism needs to be used for...
00:02:35.00 to match that prism in the objective.
00:02:37.19 And so, much like you have for phase contrast,
00:02:39.26 there's a turret beneath the condenser lens
00:02:43.20 that contains the DIC prisms.
00:02:47.07 And again, the DIC prisms differ
00:02:50.15 depending on whether or not you have...
00:02:52.25 what kind of condenser lens you have.
00:02:54.24 If it's a long working distance,
00:02:57.04 low numerical aperture of 0.55,
00:02:59.10 that DIC prism will be different than if it's a high NA
00:03:04.10 but dry 0.9 condenser lens.
00:03:07.28 And will be different yet again if it's an oil immersion
00:03:10.21 1.4 condenser lens.
00:03:13.14 So, you can end up with multiple different prisms
00:03:17.01 in order to match the objective prism.
00:03:20.13 Alright?
00:03:21.25 And then, finally, you have to make sure
00:03:24.19 you've got the correct prisms,
00:03:26.17 that they're inserted,
00:03:28.05 and then you need to add the correct bias retardation
00:03:30.04 to brighten the image, as we've discussed previously.
00:03:32.17 And then... and then, finally, after you've got the image brightened,
00:03:36.18 then you adjust the compensation for maximum contrast
00:03:39.20 and structural detail of interest, as we discussed.
00:03:43.00 So, here's an example image of mismatched prisms.
00:03:46.02 And if... if you don't have a prism...
00:03:49.26 if you have just one prism,
00:03:51.22 what you see when you look between crossed polars
00:03:54.25 and focus on the objective back focal plane,
00:03:57.18 is you'll see a dark line running diagonally in one direction.
00:04:03.19 The prism... the slope of the prism is running this way
00:04:10.21 from essentially 10 to 4, alright?,
00:04:13.16 and then this is across the prism running from,
00:04:16.15 let's say... what is that?...
00:04:19.16 2 to 8, something like that.
00:04:21.22 And the dark... the middle of the dark line
00:04:23.23 is where the thickness of the lower prism
00:04:28.02 is equal to the thickness of the upper prism,
00:04:30.11 so there's no net retardation difference
00:04:33.02 between the two wavefronts at that point.
00:04:34.28 And then as we go off towards the edges of the prism,
00:04:39.00 we bigger and bigger retardations in the prism,
00:04:41.22 and those are the things that have to be cancelled,
00:04:43.26 in equally and opposite directions,
00:04:46.05 by the... the corresponding prism, that is.
00:04:51.06 The condenser and the objective prism have to be matched.
00:04:54.11 So, this could be just one prism without the other one,
00:04:57.15 or it could be two prisms
00:05:00.01 and they're not matched.
00:05:01.19 And you'll still see this dark bar, right?
00:05:04.07 Alright?
00:05:05.26 And you don't get much of a good image.
00:05:08.10 So, here we have matched the prisms, alright?,
00:05:13.08 but we haven't opened up the condenser diaphragm plane
00:05:15.21 in order to match the numerical aperture of the objective,
00:05:19.27 and so we get very poor image quality
00:05:23.08 because we're not getting good oblique illumination
00:05:26.07 that you'd get from high NA illumination from the...
00:05:29.01 from the condenser.
00:05:30.11 And then, here we've got a nice match
00:05:33.22 of both the prisms
00:05:36.00 as well as a fully illuminated objective aperture.
00:05:39.07 And now we get this really nice high-resolution image
00:05:42.16 of my cheek cell.
00:05:44.15 So, that... that's not so hard to do.
00:05:47.07 You have to just methodically work it through.
00:05:50.08 And then... often, again, once you have a microscope
00:05:52.16 set up for a certain set of objectives,
00:05:54.10 it's relatively quick to implement and use.
00:06:00.27 Now, in polarization microscopy,
00:06:04.29 you can color an image by using a compensator that's a...
00:06:17.21 has a retardation that's equal to the wavelength of green light.
00:06:22.15 So, 550 nanometers would be the retardation
00:06:26.06 that you would put in to an e and an o wave.
00:06:29.26 And if you illuminate the specimen with white light,
00:06:32.26 what happens is the background experiences
00:06:36.05 a 550 nanometer retardation,
00:06:39.03 which for green light brings the e and the o wave...
00:06:42.09 so, you're comin' along and go... fwoomp.
00:06:44.24 And they go... one goes faster, and one goes slower.
00:06:47.27 But in fact, if you go a full wavelength...
00:06:50.19 do do do do doo...
00:06:52.20 that's the same as lining up the two sine waves again,
00:06:55.22 and you end up with the initial plane of polarization,
00:06:57.26 and that's canceled by the analyzer.
00:07:00.17 And so, it's called a red plate
00:07:03.23 because when you illuminate the specimen with white light, right?,
00:07:09.10 you cancel out green light and let just
00:07:13.18 blue light and red light go through,
00:07:17.10 and that produces sort of a magenta background color.
00:07:20.07 And if you have retardations in the specimen
00:07:25.13 that add to the... to the retardation of the red plate,
00:07:29.08 then that will in turn cancel the red light
00:07:32.29 and leave you with green and blue coming through,
00:07:35.23 which is sort of a...
00:07:41.10 the color of the water in the Caribbean, right?
00:07:43.15 A very light, light, light bluish color, right?
00:07:46.20 On the other hand,
00:07:48.24 if you have retardations that end up cancelling the retar...
00:07:52.18 subtracting from the retardation of the red plate,
00:07:55.25 then you'll end up with a net retardation
00:07:59.02 that's equivalent to the wavelength of blue,
00:08:01.15 and then you'll get an image that's made from red and green,
00:08:04.07 and that looks yellowish.
00:08:06.00 And so, you can see, you know,
00:08:08.07 particularly refractive boundaries colored red and blue.
00:08:12.05 And I have some images, here,
00:08:14.05 that sort of represent that.
00:08:17.17 Now, that's how you see, like, in Nova and other places,
00:08:21.23 where people have used DIC,
00:08:23.14 and they make these nice colored movies
00:08:25.09 and how they got the movie to be colored.
00:08:28.01 Now, you can't always be sure anymore,
00:08:28.18 because people can do digital processing and do that,
00:08:31.08 but in the early days, that's how they did it.
00:08:33.24 Now, I'd like to say a few words
00:08:36.02 about high resolution video or digitally enhanced DIC microscopy.
00:08:42.22 Now, if you look down the microscope at this specimen,
00:08:45.24 you can't see the microtubules.
00:08:47.22 The eye is sort of a logarithm protector
00:08:51.04 and is unable to see the little bit of scattered...
00:08:53.27 the contrast from the little bit of scattered light from these...
00:08:57.08 these native microtubules,
00:09:00.03 relative to the background.
00:09:02.18 But with the awesome power of electronic contrast enhancement,
00:09:05.18 you can bring up this scattered light
00:09:08.07 and make these objects visible.
00:09:11.13 And in order to do high resolution, high contrast imaging,
00:09:15.20 particularly of these very fine structural details,
00:09:19.01 it's important to fully and evenly illuminate the objective aperture,
00:09:22.23 like a 1.4 NA objective.
00:09:25.00 That means oil immersion for both the condenser and the objective,
00:09:28.11 and no air bubbles, alright?
00:09:30.15 And it takes practice to learn how to have no air bubbles, right?
00:09:34.18 You have to match the DIC prisms,
00:09:36.27 and you need to have
00:09:39.10 what are called strain-free objectives.
00:09:40.25 That is, in the man...
00:09:42.14 in the manufacturing of objectives,
00:09:44.14 if there are stresses or strains in the glass or the cements,
00:09:47.16 this can produce birefringence that makes a noise,
00:09:51.05 and that noise will obliterate the contrast
00:09:55.15 that would be coming from a weakly birefr...
00:09:57.25 a weakly scattering specimen.
00:10:02.10 Nowadays, we mostly use
00:10:05.27 polarization type polarizers
00:10:07.29 and that have what are called 35% transmission efficiency.
00:10:13.22 And we use filters that have almost 100% transmission efficiency.
00:10:19.04 And so, this is easy... easy to do.
00:10:23.08 And after that, you have to accurately cross the polarizer and analyzer,
00:10:27.27 which I mentioned earlier,
00:10:29.11 and that turns out to be very important.
00:10:30.21 A lot of people don't pay attention to that,
00:10:32.13 and the manufacturers are off by just a little bit
00:10:34.22 of where they have the lines marked,
00:10:36.14 and that can make a big difference in the noise in the background...
00:10:40.19 doing that.
00:10:42.01 And as I mentioned, about a fifteenth of a wavelength is...
00:10:43.26 turns out to be a good bias compensation.
00:10:48.06 If you're gonna do high resolution,
00:10:50.06 you have to have vibration isolation.
00:10:52.17 So, if you can hit the wall or the floor around you
00:10:56.07 and your image disappears on you or something,
00:10:58.08 then you know that you've got vibration problems,
00:11:00.08 and you won't be able to see the highest resolution, right?
00:11:04.10 You need to correct, if possible, for spherical aberration.
00:11:09.02 And so, if you're looking at microtubules close to the coverslip surface,
00:11:11.17 the objectives and oil immersion are corrected for that.
00:11:14.11 If you're going deep into water,
00:11:16.14 then you have to use water... water immersion to deal with that.
00:11:20.06 Finally, we have always used a magnification to the objective
00:11:23.11 that's three times the pixel size
00:11:26.18 divided by the optical resolution.
00:11:29.05 So, for example, if your pix...
00:11:31.20 camera pixels have 7 microns pixel size
00:11:35.29 and your optical resolution, determined by the Abbe formula,
00:11:43.04 is 210 nanometers, let's say,
00:11:45.12 then the magnification you're gonna need to the...
00:11:50.27 to the camera...
00:11:52.12 between the specimen and the camera is 100,
00:11:54.15 in order to achieve the full, maximal resolv...
00:11:58.02 resolution capabilities.
00:12:00.08 And finally, if you're gonna really be able
00:12:03.14 to define position accuracy well,
00:12:05.22 you're gonna need 10,000 or more photons counted per pixel,
00:12:08.20 on the average,
00:12:10.16 for good signal to noise.
00:12:11.22 Right?
00:12:13.04 So, you need bright light sources or long enough exposures.
00:12:16.14 Now, I just made a kind of a plot of a measured...
00:12:19.05 the measured fluorescence of a 100-nanometer bead, right?,
00:12:25.00 which is the...
00:12:26.19 and then the theoretical point spread function,
00:12:28.21 which is this line that's just inside this solid line here.
00:12:30.25 Alright?
00:12:32.14 This is the beam size here.
00:12:34.03 And then this... superimposed on this
00:12:36.14 is the projected images of the pixels.
00:12:40.05 And so, you can see, with 3 pixels per radius of the Airy disk,
00:12:45.18 you can define very nicely the...
00:12:48.21 what the Airy disk really looks like
00:12:51.01 and being able to resolve two adjacent structures
00:12:53.13 at the theoretical limit of resolution.
00:12:58.01 Now, brightness of the light source depends on
00:13:00.10 magnification, time, and resolution.
00:13:02.07 And you'll remember that the intensity in the images is...
00:13:06.20 it's given by 1 over the magnification squared,
00:13:10.05 so the higher the magnification,
00:13:11.21 the lower the intensity is.
00:13:14.25 The illumination that you need
00:13:21.00 also varies with 1 over the exposure time
00:13:24.05 that you have available.
00:13:25.25 So, if you're doing things with video rates
00:13:29.05 for video work, right?,
00:13:31.11 you'll need 30 times the intensity from your light source
00:13:35.02 than if you are willing to do...
00:13:37.16 just do time lapse of something
00:13:39.16 with a 1 second exposure,
00:13:41.00 where you can use a much less intense light source.
00:13:44.07 Now, video needs a bright light.
00:13:47.02 We in the past have used mercury light sources
00:13:50.19 with fiber-optic scramblers.
00:13:52.06 Nowadays, you can get quite intense light-emitting diodes
00:13:55.26 that can produce the 10 milliwatts of, let's say, green light
00:13:58.09 that you need to make a nice image of a microtubule.
00:14:01.14 Right?
00:14:03.07 On the other hand, if you're doing time lapsing
00:14:05.27 of things happening in cells at slow rates
00:14:09.11 and integrating for, let's say,
00:14:13.06 200 milliseconds to a 1 second exposure,
00:14:15.23 then even a quartz halogen lamp
00:14:18.09 is sufficient with the...
00:14:20.21 using, again, heat reflecting filters
00:14:24.27 and green light filters...
00:14:28.14 so, if you're gonna do live cell work, right?
00:14:31.25 Now, it's good to have some resolution tests
00:14:34.14 for what you're looking at,
00:14:36.03 and these are my squamous cheek cells, again,
00:14:39.01 looked at with a 20x objective
00:14:41.03 with an NA of 0.45.
00:14:43.09 And then, if you use a really well aligned microscope
00:14:47.17 at the highest resolution
00:14:49.07 -- this was a 100x objective... NA 1.4 DIC objective
00:14:54.01 with a fully illuminated objective aperture
00:14:56.17 with a 1.4 NA oil immersion condenser --
00:15:00.14 you can see at the periphery of these cheek cells
00:15:02.28 all these little ridges that are separated
00:15:05.25 by about 1 micron really nicely defined.
00:15:08.29 So, you carry around with you a pretty good resolution test
00:15:13.11 for the performance of your microscope:
00:15:15.09 if you can see, very nicely, the fingerprints on the surface of these cells.
00:15:19.03 The other thing that was or used to be available
00:15:23.03 from Carolina Biological Supply,
00:15:24.26 and I don't know whether they still are,
00:15:27.15 is they sold these diatom test plates.
00:15:30.13 And diatoms have a... sort of a silica pillbox structure --
00:15:34.26 an upper layer and a lower layer.
00:15:36.25 And the silica shells have
00:15:40.08 genetically encoded regular arrays of pores in their surfaces.
00:15:48.23 And this one here is called Pleurosigma,
00:15:50.20 and the separation of the pores,
00:15:53.11 which I'm standing on, here, right here,
00:15:55.14 D... I guess I have to come over here a little bit,
00:15:59.08 right about there... this is 0.61.
00:16:02.15 And Surirella, which is this one here,
00:16:04.14 is about 0.41 between each of these holes.
00:16:08.19 And then this one here is called Amphipleura,
00:16:10.27 this little guy at the very end, right?
00:16:14.26 And it has rows of holes.
00:16:19.06 And the hole... the rows are separated by 0.24 microns,
00:16:22.08 or 240 nanometers,
00:16:24.02 and the holes are separated by 170 nanometers.
00:16:27.19 And these images were taken in green/550 nanometers light,
00:16:31.05 and you can't see the holes,
00:16:33.15 even though we're working at maximum resolution.
00:16:35.27 If you put a blue filter in there,
00:16:38.05 so you can shorten the wavelength,
00:16:39.27 then the holes become very easily distinguishable.
00:16:42.26 I hope these can still be made available.
00:16:44.23 They were really nice for checkin' out your microscope.
00:16:48.23 Now, a couple of words about video-enhanced contrast.
00:16:51.01 This technology was discovered and advanced
00:16:55.20 by Shinya Inoue and the late Robert Allen in the...
00:16:58.29 in the early 1980s,
00:17:01.19 and was rapidly taken advantage of
00:17:04.29 by a lot of neurobiologists, cell biologists,
00:17:08.00 and others to look at...
00:17:10.27 using video cameras to look at dynamics
00:17:14.09 of cellular fine structure.
00:17:18.13 And this was a published image from the Inoue lab of how...
00:17:22.03 this is the view by eye,
00:17:23.26 and this is the video-enhanced contrast image.
00:17:26.10 And I gu... I made an example, here,
00:17:28.28 of what our microtubules look like
00:17:30.27 if you look by eye.
00:17:32.24 And then if you use the contrast-enhancement features of your camera
00:17:38.07 or your computer image processing system,
00:17:44.14 you can bring up the microtubules on the surface
00:17:46.13 -- you can see that --
00:17:48.03 but you also bring up all the inhomogeneities in the illumination system.
00:17:50.13 And so, what you do is you de-focus a bit,
00:17:54.05 and these inhomogeneities don't go out of focus that fast,
00:17:58.01 and you store this as an image,
00:18:00.14 a separate image.
00:18:01.27 And then from then on,
00:18:03.26 you subtract this image from the incoming image,
00:18:06.19 and now you can see very nicely
00:18:09.16 the microtubules sitting on the surface of the glass.
00:18:11.17 And if you do a little frame averaging --
00:18:13.14 sequential frame averaging --
00:18:17.00 you can make microtubules look like telephone poles.
00:18:21.13 So, these are very important for video assays,
00:18:23.01 for people who study motor proteins.
00:18:25.10 Very important in the life and career of our...
00:18:29.06 my host, Ron Vale, for example,
00:18:31.02 in the discovery of kinesins
00:18:33.01 and other things that they've done.
00:18:34.15 And very important in looking at a lot of
00:18:38.23 the dynamics of cellular fine structure
00:18:40.18 at the limit of resolution.
00:18:42.21 And so, this just summarizes this.
00:18:45.07 The view by eye, analog contrast enhancement,
00:18:48.07 or... this is the slightly de-focused image
00:18:51.17 to store the background image,
00:18:53.22 this is after subtraction of the background,
00:18:55.19 and you can look at live video rates or...
00:18:58.13 and this is the im...
00:19:00.27 image increased in contrast by sequential averaging.
00:19:04.22 So, I would like to just finish up
00:19:07.04 by showing you a couple more things.
00:19:09.18 One is this nice video-enhanced DIC
00:19:13.07 time lapse of a newt lung cell.
00:19:15.02 The time is given up here
00:19:18.23 in hours, minutes, and seconds.
00:19:20.21 And we start at prophase.
00:19:25.02 This is the nuclear envelope,
00:19:27.07 so you can see that very nicely.
00:19:28.27 And this is one of the centrioles at the... in the...
00:19:32.25 of the spindle pole that's in focus.
00:19:34.29 The other spindle pole is down here,
00:19:36.19 and it's out of the plane of focus.
00:19:38.11 And with this contrast enhancement,
00:19:40.15 you can make the depth of focus in the specimen
00:19:43.21 as narrow as about 250 nanometers.
00:19:46.26 And Shinya Inoue has a nice paper on that.
00:19:49.25 So, if you search for that,
00:19:54.18 somewhere around 1980...
00:19:57.10 1989 or 1990.
00:20:00.04 It's very nicely demonstrated there.
00:20:01.20 And so, this is a fairly thin optical section through this nucleus.
00:20:04.06 And these are the condensed chromosome arms,
00:20:06.23 just about ready to get into mitosis
00:20:09.20 at the time when the nuclear envelope breaks down.
00:20:12.26 And so, the movie will start here with entry into mitosis.
00:20:16.19 And you can see great detail
00:20:18.28 about what's going on.
00:20:21.08 Here's this one pole, way over here.
00:20:23.03 I don't know how to get there...
00:20:24.21 there it is, right there.
00:20:26.05 And the pair of centrioles... sometimes you can see both centrioles.
00:20:29.17 And then you can see individual kinetochore fibers
00:20:31.28 that connect the chromosomes to the spindle.
00:20:33.29 And then, finally, we go into anaphase,
00:20:38.03 and here comes the furrow.
00:20:40.00 And so, this was used to study in great detail,
00:20:43.04 by our lab actually,
00:20:45.09 the movements of kinetochores and motions in cells,
00:20:50.22 and define this kinetochore directional instability --
00:20:54.18 their ability to move with polymerization and depolymerization
00:20:58.00 of their kinetochore microtubules --
00:21:00.07 a number of years ago.
00:21:01.24 Because you can make a... I think...
00:21:04.01 we did this by video,
00:21:06.00 and every image was taken every 2 seconds,
00:21:07.20 and so you could get very high spa...
00:21:09.16 temporal as well as spatial resolution.
00:21:11.28 Now, we've also used digitally enhanced DIC microscopy.
00:21:17.02 And this is for budding yeast mitosis.
00:21:21.13 And this was a... kind of the first set of imaging
00:21:24.23 that was done in order to define the cell cycle time
00:21:26.26 in budding yeast,
00:21:28.29 which is a model genetic organism
00:21:31.29 that's used, in fact, to study many aspects
00:21:34.22 of the molecular and protein functional aspects
00:21:38.07 of how mitosis works.
00:21:40.19 And this is the first time we were able to image
00:21:43.16 the actual 2-micron mitotic spindle
00:21:46.09 that forms intranuclearly in the...
00:21:51.02 in the... in the budding yeast here.
00:21:52.22 And then these subsequent images
00:21:54.15 are the elongation of the spindle as anaphase starts.
00:21:56.27 And then back over here... oops...
00:21:59.11 I gotta come back down here...
00:22:00.28 you can see in the next slide...
00:22:02.27 and I'll get over here...
00:22:04.14 we progress further into mitosis with further nuclear elongation.
00:22:08.16 And then, eventually, the nucleus puts one set of chromosomes
00:22:12.04 into the bud.
00:22:14.06 And then down here, on the bottom,
00:22:16.06 after it's elongated that all out,
00:22:18.13 it then divides the cell into two.
00:22:20.13 And so, the DIC was very important in setting up
00:22:24.06 cell cycle timing for yeast.
00:22:25.24 This then was used to look
00:22:28.01 with fluorescent protein-labeled cells that...
00:22:31.06 how different proteins function in the cell cycle.
00:22:35.16 And I want to stop with...
00:22:37.19 stop with one last point, which is DIC is often used in kind of...
00:22:41.18 in a multimode setup
00:22:45.08 to provide structural images of cells
00:22:49.02 at the same time that
00:22:53.03 fluorescently labeled proteins,
00:22:54.27 like GFP-labeled proteins,
00:22:56.13 tell us where proteins are in cells.
00:22:59.18 And to do that,
00:23:02.01 we need to have a shutter on the illumination path
00:23:05.10 that we control.
00:23:06.28 We can sort of leave all the DIC optics alone, here,
00:23:12.00 leave the prism in the light path.
00:23:13.16 And you have to have a system for selecting what the...
00:23:20.02 the illumination, here,
00:23:23.11 and the wavelength you wanna use for the DIC imaging
00:23:27.20 is gonna be the same wave... wavelength of...
00:23:31.17 that can be passed by one of these filter cubes.
00:23:34.00 We often using a dichroic mirror
00:23:40.22 in the light path that is mod...
00:23:43.06 can do multi-wavelengths
00:23:45.24 of blue, red, and green.
00:23:49.20 So... that lets use just an excitation filter wheel over here
00:23:57.08 to select which color fluorophore you're gonna excite.
00:24:00.10 And then there's an emission... an analyzer...
00:24:04.19 an emission filter wheel.
00:24:06.07 And one of those openings in the emission filter wheel
00:24:08.26 contains the analyzer.
00:24:12.23 And you have to put that analyzer in the light path
00:24:15.29 when you take the DIC image.
00:24:18.16 But because that analyzer
00:24:20.24 absorbs more than 50% of the light...
00:24:23.01 first of all, it's gonna absorb light
00:24:27.13 vibrating perpendicular to its transmission direction, right?
00:24:29.11 So, light that's comin' this way... psshht... not gonna go through.
00:24:33.01 But even for like vibrating in the direction of its transmission,
00:24:35.07 you still absorb about 15 or 20% of it.
00:24:38.29 And so, it makes the fluorescence image
00:24:41.22 very unuseful.
00:24:43.16 And so, you have to rotate that out of the light path.
00:24:46.16 And so, in the beginning,
00:24:48.04 we did that through rotating the filter wheel.
00:24:49.20 And the manufacturers now have rotatable nose pieces,
00:24:51.22 so you can put the analyzer
00:24:54.04 in one of the slots instead of a filter cube, for example.
00:24:59.22 And some of the manufacturers actually have an analyzer
00:25:02.01 that goes in, and at just the right place,
00:25:04.18 but what happens is that it has a little motor on it.
00:25:09.00 And it can either push the analyzer in or take the analyzer out,
00:25:12.14 so your computer can control
00:25:14.15 whether it is or isn't in the light path, right?
00:25:16.13 We get to my last slide.
00:25:18.07 Then, you can get these very nice images
00:25:19.29 where you can have DIC of the structure of the cells,
00:25:23.09 like this yeast cell here,
00:25:25.03 and we have actually two fluorescent markers:
00:25:27.11 one for kinetochores bound to chromosomes in this yeast cell,
00:25:31.11 and then a red marker for proteins
00:25:33.26 that are at the spindle poles in the yeast cell.
00:25:37.04 And then, this...
00:25:38.25 this can be either in a time lapse movie
00:25:41.02 or a part of a screen for whether or not
00:25:44.20 you've got normal spindle assembly or what have you.
00:25:46.08 So, thank you very much.

This Talk
Speaker: Ted Salmon
Audience:
  • Researcher
Recorded: July 2012
More Talks in Microscopy Series
  • Phase, Polarization, and DIC Stephen Ross
    Phase, Polarization, and DIC Microscopy Lab
  • Introduction to Fluorescence Microscopy
  • Timothy Mitchison Fluorescent Probes.jpg
    Fluorescent Probes: Organic Dyes and Quantum Dots
All Talks in Microscopy Series
Share

Talk Overview

In this lecture titled “Pragmatics of DIC and Video-Enhanced Contrast Microscopy,” Ted Salmon extends the beginning DIC lecture by discussing how to align the DIC microscope, how color DIC is produced, how to use video-enhancement to visualize faint objects such as microtubules and how to combine DIC with fluorescence.

Questions

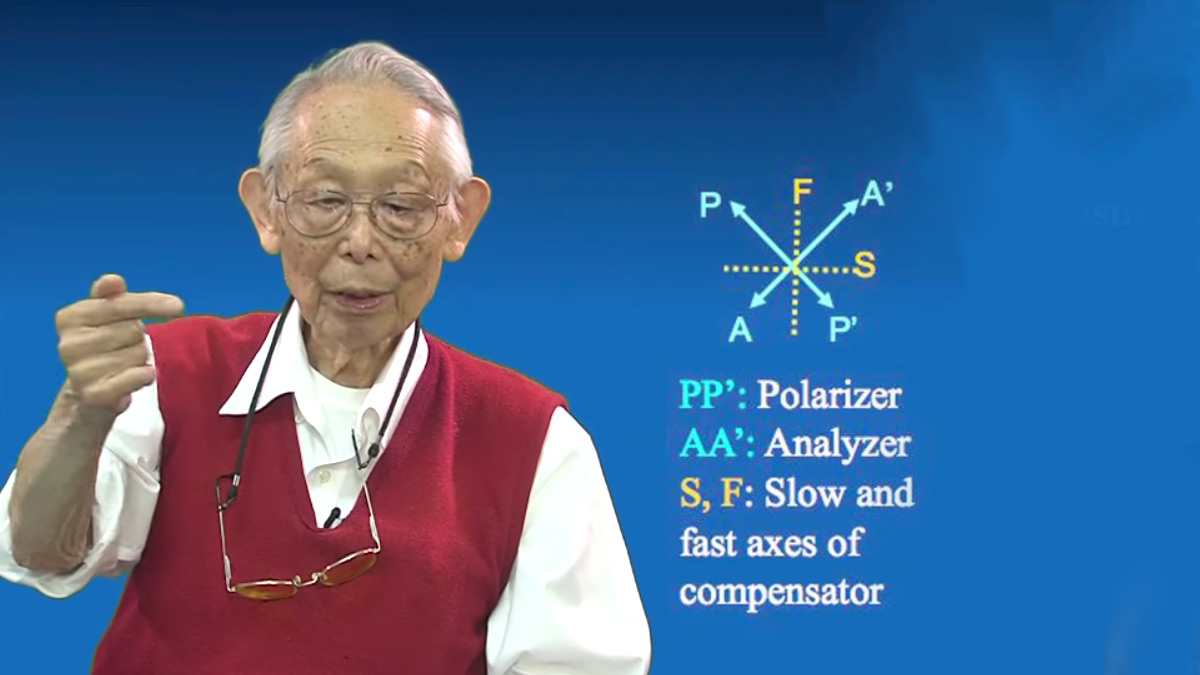
  1. In DIC microscopy, if you remove one of Wollaston prisms (or have mismatched prisms), and you look at the back focal plane of the objective you will see:
    1. A very fuzzy image of the specimen.
    2. A bright central spot with a dark halo
    3. A diagonal black band
    4. A repeating light-dark pattern
  2. Which of the following steps is not part of setting up high resolution DIC microscopy
    1. Koehler Illumination
    2. Closing down the condenser diaphragm to increase contrast
    3. Adding bias retardation to brighten the image
    4. Using a bright illumination source such as a mercury lamp or laser
    5. Crossing the polarizer and analyzer
  3. In video-enhanced DIC microscopy, which of the following steps help to produce a more homogenous image
    1. Using a light source with even illumination
    2. Subtracting out a slightly out-of-focus background image
    3. Averaging several frames
    4. A and B
    5. A, B and C
  4. For acquiring a time-lapse of successive DIC and fluorescence images, it is best to
    1. Place the analyzer in the emission filter wheel
    2. Use a fixed analyzer prior to the emission filter wheel
    3. Do not use an analyzer
    4. Place the analyzer in the dichroic filter cube
    5. Place the analyzer in the camera C-mount

Answers

View Answers
  1. C
  2. B
  3. E
  4. A

Speaker Bio

Ted Salmon

Ted Salmon

Ted Salmon is a Distinguished Professor in the Biology Department at the University of North Carolina. His lab has pioneered techniques in video and digital imaging to study the assembly of spindle microtubules and the segregation of chromosomes during mitosis. Continue Reading

Playlist: Microscopy Series

  • Examples of Using Polarization Microscopy: Shinya Inoue
    Examples of Using Polarization Microscopy
  • Phase, Polarization, and DIC Stephen Ross
    Phase, Polarization, and DIC Microscopy Lab
  • Introduction to Fluorescence Microscopy
  • Timothy Mitchison Fluorescent Probes.jpg
    Fluorescent Probes: Organic Dyes and Quantum Dots

Reader Interactions

Leave a Reply Cancel reply

Your email address will not be published. Required fields are marked *

Primary Sidebar

Like our Website?

You'll love our newsletter...

  • Sign up for:
    • Exclusive iBiology content
    • 10 Must See Biology Videos
    • Talks by 20+ Nobel Winners
    • Our young Scientist Survival Toolkit
    • Talks by trailblazing Women in Biology
    • Updates on exciting iBiology projects in development
    Tyler Allen
  • This field is for validation purposes and should be left unchanged.

Privacy Policy

Help us keep bringing the world’s best biology to you!

Footer

Funders

National Science Foundation: NSF
Lasker Foundation
NIGMS

Partners

EMBL
EMBO
HHMI
NRMN
UCSF

Start Here

  • Talks for Everyone
  • Talks for Students
  • Talks for Research
  • Talks for Educators

Explore

  • Explore
  • All Playlists
  • All Speakers
  • All Talks

Talks By Topic

  • Biochemistry
  • Bioengineering
  • Biophysics
  • Cell Biology
  • Development and Stem Cells
  • Ecology
  • Genetics and Gene Regulation
  • Human Disease
  • Immunology
  • Microbiology
  • Neuroscience
  • Plant Biology
  • Techniques

Talks by Series

  • Bench to Bedside
  • Famous Discoveries
  • Great Questions
  • Share Your Research Series

Career

  • Professional Development
  • Career Exploration
  • NRMN Resources
  • Biomedical Workforce

Courses

  • Microscopy Series
  • Short Microscopy Series
  • Open edX Courses
  • Cell Biology Flipped Course
  • Engineering Life Flipped Course
  • Evolution Flipped Course

Educator

  • Educator Registration
  • Educator Resources
  • Log In

About Us

  • About Us
  • iBiology Team
  • Wonder Collaborative
  • Contact Us
  • Mission
  • Privacy Policy
  • SCL Financial Conflict of Interest Policy

This material is based upon work supported by the National Science Foundation and the National Institute of General Medical Sciences under Grant No. 2122350 and 1 R25 GM139147. Any opinion, finding, conclusion, or recommendation expressed in these videos are solely those of the speakers and do not necessarily represent the views of the Science Communication Lab/iBiology, the National Science Foundation, the National Institutes of Health, or other Science Communication Lab funders.

© 2022 - 2006 iBiology · All content under CC BY-NC-ND 3.0 license · Privacy Policy · Terms of Use · Usage Policy
 

Power by iBiology