• Skip to primary navigation
  • Skip to main content
  • Skip to primary sidebar
  • Skip to footer

iBiology

Bringing the World's Best Biology to You

  • Start Here
    • Explore iBiology
    • All Playlists
    • All Speakers
    • All Talks
    • What’s new at iBiology?
  • Research Talks
    • Talks by Topic
      • Biochemistry
      • Bioengineering
      • Biophysics
      • Cell Biology
      • Development and Stem Cells
      • Ecology
      • Evolution
      • Genetics and Gene Regulation
      • Human Disease
      • Immunology
      • Microbiology
      • Neuroscience
      • Plant Biology
      • Techniques
      • Archive
    • Talks by Series
      • Bench to Bedside
      • Famous Discoveries
      • Great Unanswered Questions
      • Microscopy Series
      • Young Scientist Series
  • Stories
    • Background to Breakthrough
    • Interviews and Profiles
    • Science and Society
  • Courses
  • Careers
    • Professional Development Talks
    • Professional Development Courses
    • Career Exploration
    • NRMN Resources
    • Biomedical Workforce
  • Educators
  • About
    • Mission
    • iBiology Team
    • Board of Directors
    • Make a Donation
    • iBiology Funders and Partnerships
    • Contact Us
  • Donate
Home » Courses » Microscopy Series » Fluorescence Microscopy

Summary: Designing a Fluorescence Microscopy Experiment

  • Duration: 36:58
  • Downloads
    • Hi-Res
    • Low-Res
  • Subtitles
    • English
  • Transcript

00:00:12;12 I'm Kurt Thorn and today I'm gonna be talking about
00:00:15;17 how to design a microscopy experiment
00:00:18;13 and in the lectures throughout this course
00:00:21;17 we've talked a lot about different types of microscopes
00:00:23;24 and different techniques for optical imaging
00:00:26;05 and what I want to try to do today is share some general guidelines
00:00:30;05 to put all this together and to give some advice
00:00:32;27 about how to select from all the microscopes we've discussed,
00:00:36;00 all the different kinds of imaging techniques we've discussed
00:00:38;14 and give some general guidelines as to when you wanna choose
00:00:41;22 one kind of microscope over another.
00:00:43;23 This obviously isn't gonna be a comprehensive overview
00:00:46;28 of all the possible situations that one microscope would be appropriate over another
00:00:52;27 but hopefully I'll give you some general guidelines
00:00:54;27 to think about when you're considering for your sample
00:00:58;04 which microscope would be best to use to acquire the kind scientific data you want.
00:01:03;07 So just to give a brief overview here a sort of a summary
00:01:07;26 of kinds of things we've talked about.
00:01:10;08 Modern microscopy is really diverse
00:01:13;19 and so you can see there's this large selection of imaging methods.
00:01:16;01 We've got very simple microscopes like white field
00:01:19;19 where we don't have any special optical properties beyond what just is in the objective.
00:01:24;17 We've got sectioning techniques like total internal reflection,
00:01:27;29 various kinds of confocal imaging,
00:01:30;20 multi-photon imaging and then we've got
00:01:32;24 you know more exotic techniques, newer techniques
00:01:35;15 like super-resolution that's just coming into common usage now.
00:01:40;05 And of course there are many other kinds of
00:01:42;09 imaging modalities I'm not discussing here
00:01:44;19 but these are just the sort of general most common ones.
00:01:48;08 And then there's also
00:01:49;01 a whole series of contrasting techniques,
00:01:51;10 ways to get contrast in your sample.
00:01:53;22 So there's of course bright-field and variations on bright-field imaging,
00:01:57;21 things like phase contrast,
00:01:58;13 differential interference contrast
00:02:00;13 that just uses the native contrast the native make-up of your specimen to generate an image.
00:02:05;00 Then there are also molecularly specific ways to label your sample,
00:02:08;21 so there's of course immunofluorescence where you use antibodies,
00:02:11;13 fluorescently labeled antibodies
00:02:12;29 to the proteins or molecules in our sample
00:02:15;25 that light up specific molecules,
00:02:19;15 there are dyes that bind to membranes
00:02:21;11 or to other compartments of the cell that we can image
00:02:25;10 and there are of course genetically encodable proteins
00:02:26;18 like GFP and related fluorescent proteins
00:02:29;23 that we can use to genetically label proteins
00:02:32;08 and then there's also ways to generate contrast using light itself,
00:02:37;00 techniques like photobleaching or photoactivation
00:02:39;21 and techniques that generate contrast based
00:02:42;20 on molecular properties of your sample,
00:02:44;11 things like FRET, energy transfer techniques,
00:02:47;00 lifetime imaging and other cases where the environment
00:02:50;20 of the sample modifies the properties of the dyes.
00:02:53;05 And these contrasting techniques can in general
00:02:56;22 be used with any of the imaging modalities
00:02:59;10 I mentioned on the previous slide.
00:03:00;20 So you have this real mix-and-match kind of issue
00:03:04;10 that I have say a section labeled with immunofluorescence
00:03:06;21 and I need to choose and appropriate microscope or
00:03:08;24 a cell line that's expressing some fluorescent protein and I
00:03:11;25 need to choose an appropriate microscope and
00:03:13;19 you know what is the best way to do that.
00:03:17;06 And finally to complicate things just a bit more
00:03:18;25 there are even many kinds of experiments that you can do
00:03:22;07 with one of these samples on one of these microscopes.
00:03:25;01 You know, sometimes you'll be doing time-lapse imaging or video imaging
00:03:27;29 you'll be trying to image a sample or a cell line every 10 minutes for 12 hours or
00:03:33;07 maybe you know every 10 milliseconds for a minute
00:03:35;03 doing either fast or slow video imaging.
00:03:39;01 You can be doing 3D reconstructions
00:03:41;07 where you need to acquire Z information to
00:03:43;06 to build a three-dimensional rendering of your sample
00:03:46;08 or you can be doing things like automated imaging
00:03:48;29 in 96-well plates or other kinds of multi-point imaging
00:03:52;06 where you need to visit many points in your sample
00:03:54;02 and acquire data for many positions at once.
00:03:56;17 And then of course you can be doing many wavelengths,
00:03:58;22 you know you can be doing multiple dyes,
00:04:00;21 multiple kinds of colors.
00:04:04;24 So, the first thing you really need to think about when you need to put together
00:04:08;19 a microscopy experiment is what do you need to do,
00:04:11;26 you really need to understand what your experiment is here.
00:04:14;18 And I'm just listing here a number of things that
00:04:17;22 are sort of common things to think about
00:04:20;03 and the first thing is what resolution do you need; are you trying to
00:04:23;25 image the whole cells, are you trying to image organelles
00:04:27;18 within the cell are you trying to image whole tissues
00:04:30;06 and hand-in-hand with that is what field of view do you need.
00:04:33;10 If you're trying image something like
00:04:34;21 the structure of the endoplasmic reticulum in a cell you probably
00:04:37;28 don't need to image the whole liver,
00:04:40;03 you'd only be imaging one or few cells at a time.
00:04:43;17 So that's the first thing to ask yourself;
00:04:45;25 what resolution do you need are you trying to
00:04:47;13 see small things or big things.
00:04:49;27 And along with that do you need 3D data,
00:04:52;09 is 2D image good enough or do you need 3D
00:04:54;20 and similar if you're doing 3D what kind of resolution in Z do you need.
00:04:58;07 And going on with that how deep in your sample do you need to image,
00:05:01;25 are you imaging a very thin yeast cell or a monolayer of tissue culture cells
00:05:07;01 or you're imaging something like a brain slice or an organ explant
00:05:10;13 from a mouse or even you know an intact mouse,
00:05:13;11 trying to image into the brain or lymph node of a mouse.
00:05:17;22 Another question that will determine a lot of how
00:05:20;12 you choose your microscope is are your samples live of fixed?
00:05:24;02 Are you looking at live cells and trying to dynamics while they're living
00:05:27;15 or are they fixed and stained and completely dead.
00:05:32;11 You know if you're doing live imaging you need to worry about issues like
00:05:34;24 photobleaching, phototoxicity and some more things.
00:05:38;12 Are you gonna kill your cells by imaging them
00:05:40;24 whereas if you're fixed obviously killing your sample is not a concern
00:05:44;26 and that eliminates some trade-off that you might otherwise have to make.
00:05:49;26 Of course a critical question is
00:05:51;16 what dyes are you using.
00:05:52;24 If you're looking at a fluorescently labeled sample what dyes are you using.
00:05:56;13 Are they you know fluorescent proteins are they antibodies,
00:05:59;11 can you change them.
00:06:01;04 If you're doing immunofluorescence it may be relatively easy to swap out dyes
00:06:04;11 in case the microscope you have access to doesn't have a
00:06:07;08 particular laser line to image, say Cy5 you may be able to change to a different dye.
00:06:13;04 If you have say tissues from a transgenic mouse
00:06:15;19 expressing you know GFP and Cherry it may be a lot of work
00:06:18;08 to change those dyes and you really need to find a microscope
00:06:21;11 that can image those particular dyes.
00:06:24;29 Similarly you want to know how fast you need to image.
00:06:28;03 Are you trying to take video rate data and go very quickly
00:06:30;25 and get movies of your sample in real time
00:06:32;27 or you're doing long-term lapse or you're just doing single, time-point imaging.
00:06:38;19 And again there'll be trade-offs here as to what microscopes can go quickly
00:06:43;16 or what microscopes have the facility for preserving cells,
00:06:48;00 keeping them alive for over 12 hours to do an overnight experiment
00:06:51;06 and holding focus over that time period.
00:06:54;19 And then finally there's this sort of grab-bag thing at the bottom here
00:06:57;05 which is are there special requirements for your cells and
00:06:59;23 that could be all kinds of things.
00:07:02;11 That could be you know; oh I'm trying to a FRET experiment
00:07:04;10 and so I need the right filters to do FRET,
00:07:07;18 it could be you know I am trying to do lifetime imaging experiment so I need a lifetime imaging microscope,
00:07:12;17 you know it could be I am trying to do single molecule imaging and I need to do single molecule stuff.
00:07:18;25 And so this just is some things you should think about before
00:07:22;14 you start looking for microscope and start planning your experiment
00:07:26;02 and if you have some idea of what requirements are here it'll make it much easier to
00:07:29;22 choose an appropriate instrument to acquire your data.
00:07:32;27 And so in the next several slides I just want to go through some
00:07:36;09 of these briefly to discuss some of the trade-offs you'll want to think
00:07:40;01 about in doing your imaging.
00:07:42;13 So first off, resolution.
00:07:44;11 Resolution is set by the objective of your microscope
00:07:47;07 so you often have a lot of control over this
00:07:49;02 cause most of microscopes have many different objectives and
00:07:52;03 as we've talked in other lectures the resolution of the objective is just
00:07:56;27 .61 wavelength you're imaging at divided by the NA of the objective.
00:08:02;28 And so for high resolution you need high NA objective
00:08:06;04 and that generally goes along with high magnification objective so you can get enough...
00:08:09;24 you can sample the data well enough with your camera.
00:08:13;00 So I'm gonna illustrate two hypothetical examples here.
00:08:18;10 So imagine you're looking at cell-specific protein expression.
00:08:21;21 You've got some transgene you wanna see you know is it expressed
00:08:25;03 in this type cell type or that cell type say in a tissue.
00:08:27;21 You've got a tissue slice and you wanna know which cells in a tissues are expressing this protein
00:08:33;00 then you don't need very high resolution,
00:08:34;09 you just need enough resolution to separate one cell from the next
00:08:37;03 so you know something like a 1 micron resolution might be sufficient
00:08:41;03 to get an image of this tissue where you can resolve individual cells.
00:08:44;10 You don't need to see any subcellular detail here
00:08:47;08 cause then our hypothetical example this protein is present uniformly throughout the cell
00:08:51;14 and so you'd say oh 10x /.45 NA objective is probably sufficient
00:08:56;12 and that'll give you a resolution of 600-700nm
00:09:00;20 which is certainly sufficient to see a single cells.
00:09:04;19 Conversely you might be trying to do something like
00:09:06;19 image a mitochondrial shape and dynamics
00:09:09;16 so now you want to image not just individual mitochondria
00:09:11;26 but you want to be able to see how large they are what their length is
00:09:15;26 when they're fusing and fissioning and this,
00:09:18;12 you know mitochondria are very small they're a few hundred nm across
00:09:21;22 and so this pretty much means you need highest resolution possible .
00:09:24;18 So you would use something like a 100x/1.4 NA objective.
00:09:29;23 Here just some images taken with these two different objectives
00:09:33;24 to sort of show you graphically what the trade-offs are and
00:09:36;24 you can see here with this 10x/.45 NA objective
00:09:40;00 you know you've got a lot of cells in the field of view here these are just some
00:09:43;13 fixed and stained tissue culture cells
00:09:45;26 you can see there's many of them filling the field of view
00:09:48;22 but we don't get really high resolution of any of them.
00:09:52;00 If we then take the same sample and switch up to a 100x objective
00:09:55;11 now you can see the field of view is much smaller
00:09:58;19 in fact it is 10x smaller on each side so we're imaging just 1% of the areas before
00:10:03;20 and you can see that the cell here pretty much completely fills the field of view
00:10:07;23 but now you can see a lot more subcellular detail,
00:10:10;19 so the green here are staining actin filaments
00:10:12;07 you can see these nice actin filaments these stress fibers
00:10:16;03 and the red is staining mitochondria
00:10:16;28 and you can see all the mitochondria in these cells
00:10:18;20 which you couldn't see in the lower resolution image, the 10x image.
00:10:22;21 But in the 10x image we have a lot more cells,
00:10:27;06 so there's a trade-off here, if you're trying to do
00:10:30;00 stuff where you don't need a high resolution
00:10:31;10 in general you'll want to stay with lower magnification, lower NA lens
00:10:34;29 so you can get a bigger field of view and get more cells get better statistics.
00:10:39;23 But if you need to work at high mag and high resolution,
00:10:41;27 you don't really have a choice there.
00:10:43;16 You're going to have to accept the small field of view.
00:10:47;27 Changing numerical aperture of your objective changes some other things as well
00:10:51;18 so as I mentioned it increases your resolution,
00:10:54;00 so increasing the NA increases your resolution.
00:10:58;05 Increasing your NA also increases your Z resolution at a different rate,
00:11:01;22 it goes up as a square of NA so your Z resolution improves faster with increasing NA that your XY does.
00:11:08;22 And it also increases the light gathering power of your objective
00:11:11;17 because the NA is just the measure of the cone angle of light
00:11:14;19 you can collect so if you have a bigger cone angle
00:11:17;16 you can collect more light coming from your sample
00:11:19;04 than if you have a smaller cone angle.
00:11:22;21 So when you're choosing an objective of course you need to ask,
00:11:25;13 you know, what resolution you need
00:11:27;12 but you also may wanna consider how bright your sample is.
00:11:30;27 And as I said for higher resolution you need a high NA,
00:11:32;27 there's no choice there
00:11:34;00 but for dim samples you might want to use a high NA
00:11:38;00 objective to maximize your light-gathering power.
00:11:42;14 And in particular if you have dim low resolution sample,
00:11:45;26 say if you're trying to look at protein abundance
00:11:46;18 in the nucleus or in the whole cell,
00:11:48;18 you may wanna use a high NA objective
00:11:50;14 but then being your camera down so you can trade-off resolution for brightness.
00:11:54;23 This is getting a little technical but again worth thinking about.
00:11:59;07 And of course the down side here is that again
00:12:00;20 you'll lose a field of view so you'll have to take
00:12:02;03 many images to get good statistics.
00:12:06;19 So when do you wanna use low NA?
00:12:09;06 So if you have bright samples at low resolution,
00:12:12;19 you're not really trying to push the limits of the objective at all
00:12:15;03 so you can do this quite easily.
00:12:18;01 If you need low working distance, low NA objectives are good,
00:12:21;05 they have much more working distance,
00:12:22;15 much larger clearance between the objective and the sample.
00:12:26;09 So sometimes you need to use low NA objective,
00:12:28;18 for instance if you're looking through tissue culture plates
00:12:31;06 with plastic bottoms.
00:12:33;04 This is not great imaging ever,
00:12:34;14 but you know if for whatever reason your samples are constrained
00:12:37;07 to that format then you have no choice but to use low NA objective.
00:12:42;08 Another more technical issues is this spherical aberration as a concern.
00:12:45;17 Using low NA will improve
00:12:48;19 your image quality or reduce your spherical aberration.
00:12:52;02 Finally another example if you
00:12:53;26 want to get low Z resolution which means large depth of field,
00:12:58;06 low NA is good and low Z resolution
00:13:01;28 as large depth of field means you can get a whole structures,
00:13:04;13 you'll get a big band of your sample in focus
00:13:07;22 at once and that means you can avoid doing multiple
00:13:09;20 Z slices through your sample
00:13:12;16 and get in focus snapshot of a big thick area in one go.
00:13:18;15 So here's an example of that.
00:13:21;11 So imagine we wanted to record the total nuclear fluorescence,
00:13:23;21 say we were doing something like
00:13:25;15 looking at transcription factor abundance in the nucleus.
00:13:29;18 So we wanna record the total fluorescence of the nucleus
00:13:32;10 and if we use high NA objective here
00:13:36;06 you know we're gonna get just this thin band here
00:13:37;13 in focus NA one time and that's only a small chunk of the nucleus,
00:13:39;09 so in order to actually image, to measure the amount of
00:13:45;09 fluorescence in the whole nucleus we'll have to move
00:13:49;08 these steps through the nucleus to get a bunch of sections
00:13:51;25 each of which captures different regions of the nucleus and focus.
00:13:55;29 However if we switch instead to low NA objective
00:13:58;17 now our depth of field gets much larger and in fact we can capture
00:14:01;18 the whole nucleus in a focus in a single section.
00:14:05;16 Trade-off here of course is that this
00:14:06;29 objective has lower gathering power so your image will be dimmer,
00:14:10;23 it will not be as bright.
00:14:12;06 But if your fluorescence from the nucleus is reasonably intense
00:14:15;24 this may be a faster and more efficient way to collect data
00:14:18;19 because you don't need to do Z stacks and then
00:14:20;13 worry about processing all this 3D data.
00:14:23;17 You can get a single 2D image that has all the information you need.
00:14:28;26 So that brings us to thinking a little bit about 3D imaging.
00:14:32;14 So conventional white-field microscopy,
00:14:35;25 normal epifluorescence with just
00:14:38;08 a single objective and no fancy optics
00:14:41;08 gives you both in focus and out-of-focus light
00:14:42;28 and as I've talked about in our
00:14:44;21 confocal lecture and multi-photon lecture
00:14:47;28 there are techniques you can use
00:14:48;22 to prevent this out-of-focus light from being collected,
00:14:52;14 from reaching the detector.
00:14:54;19 In confocal you use a pinhole to block that out-of-focus light,
00:14:57;06 in multiphoton microscopy you don't excite it at all.
00:15:01;10 And both of those techniques give you
00:15:03;17 a single section that only has in focus light.
00:15:06;11 There's also techniques that let you remove
00:15:07;20 that out-of-focus light after the fact
00:15:09;16 such as deconvolution.
00:15:13;22 So if you are doing 3D imaging you need to think about
00:15:16;17 whether you can get by with some out-of-focus light captured
00:15:20;07 or if you need to use one of these techniques
00:15:22;01 that will prevent you from either
00:15:23;19 seeing the out-of-focus light or remove it.
00:15:26;13 So here's just an example;
00:15:28;07 this is a conventional white-field microscope image
00:15:30;24 of a tissue section and you can see
00:15:33;22 you know, it is a little bit fuzzy-looking cause there's both,
00:15:35;18 you know sharp things that are in focus in here
00:15:37;10 but also blurry stuff out of focus.
00:15:40;10 If we now use a confocal to image that same area
00:15:42;29 we see much improved contrast here
00:15:46;01 because we're removing a lot of blurry out-of-focus light
00:15:48;09 and just giving us nice sharp in focus information.
00:15:51;23 So if you are doing 3D imaging,
00:15:54;10 particularly if you're looking at fixed samples,
00:15:56;05 you need to think about whether you want this kind of
00:15:58;20 confocal technology to remove the out-of-focus light
00:16:02;20 or you can get by with the conventional white-field system
00:16:04;25 and that the out-of-focus light won't be too much of a problem.
00:16:09;17 It is very hard to give absolute rules about
00:16:12;00 when to use one technique versus the other
00:16:14;18 but in general I would say
00:16:16;23 for thick samples something like 10 times the depth
00:16:18;26 of field of the objective its worth considering using confocal
00:16:22;04 or this is maybe where confocal starts to become
00:16:25;18 significantly better than epifluorescence.
00:16:28;23 As I mentioned in the confocal lecture
00:16:30;04 there are a number of different types of confocal
00:16:32;15 and spinning disk confocal works better with live samples
00:16:35;25 due to increased sensitivity in part.
00:16:41;00 One common misconception about confocal
00:16:43;01 is that it doesn't improve resolution
00:16:45;17 over white field so if you have a thin sample,
00:16:48;29 the confocal image and the white field image will basically be the same,
00:16:51;19 so there's no benefit to using confocal if you're imagining a thin sample.
00:16:57;16 And finally despite the fact that confocal in general
00:17:01;19 has lower sensitivity than the white field,
00:17:06;02 the reduced out-of-focus light in confocal
00:17:08;02 can improve the contrast for dim sample.
00:17:11;05 What that means is even if your samples aren't bright
00:17:13;21 you may still be better off using confocal
00:17:16;28 if they're moderately thick because,
00:17:18;17 you know, white field system you'll collect more light
00:17:20;09 but the out-of-focus light may obscure
00:17:21;29 the in-focus information you want since it is dim.
00:17:25;15 So using confocal here, particularly spinning disk confocal
00:17:29;12 that is relatively sensitive,
00:17:30;28 you may get improved contrast and be able to
00:17:33;18 actually see your dim samples better than you could
00:17:35;06 on the white field system.
00:17:38;05 There's a nice paper here that discusses
00:17:41;01 in great detail the relative sensitivity of these different instruments,
00:17:44;27 but this is just sort of a general guideline
00:17:47;01 from that paper what they find in sensitivity
00:17:49;18 that white field systems are about 4x more sensitive
00:17:52;09 than spinning disk and about a 100 times
00:17:55;00 more sensitive than laser-scanning confocals.
00:17:57;26 This was done several years ago
00:18:01;27 so laser-scanning confocals are relatively old
00:18:04;20 and newer systems might not be quite as bad
00:18:07;05 but I'm not aware of a more recent measurement of this.
00:18:11;22 So which confocal do you want to use?
00:18:14;05 If your samples are alive
00:18:15;18 generally you want to use spinning disk I think.
00:18:18;25 You may also want to consider resonant laser-scanning confocal
00:18:22;11 these have been also seen to work well on live samples.
00:18:25;09 If your samples are really thick something like a
00:18:27;06 tissue explant from a mouse or a live mouse
00:18:30;28 then two-photon really shines
00:18:33;18 when you're trying to image into thick specimens.
00:18:36;24 For fixed samples generally you would start with a laser-scanning confocal.
00:18:40;18 Sensitivity isn't as much a concern here because of...
00:18:44;08 we don't have nearly as much concern about photobleaching
00:18:46;16 and phototoxicity is a non-issue.
00:18:49;02 And again for really thick specimens you would probably consider using 2-photon.
00:18:54;04 These are general guidelines and if you have access to
00:18:56;15 both types of microscope you may wanna
00:18:57;25 consider trying both to see which one works best.
00:19:04;00 I wanna briefly mention one technique
00:19:06;04 a related optical sectioning technique that’s total internal reflection.
00:19:10;16 There's a whole lecture in this course on it.
00:19:13;24 So I'm just gonna touch on it briefly.
00:19:15;21 What it does is give you 100 nm sections adjacent to the cover slip.
00:19:20;06 And this is obviously good for samples located at the cover slip.
00:19:24;15 If you're looking at something interior to the cell
00:19:26;09 like the nucleus it doesn't work at all.
00:19:29;00 But if you're looking at something like membrane dynamics,
00:19:31;10 membrane trafficking, endo- or exocytosis of proteins at the membrane
00:19:36;00 this works great because all you see is the membrane
00:19:38;03 that’s adjacent to your cover slip.
00:19:41;00 It also works well if you're looking at things in the cell cortex.
00:19:44;05 So acting immediately underlining the cell membrane
00:19:46;28 other proteins that are just
00:19:48;27 on the interior of the cell membrane
00:19:50;28 and it also is a real workhorse for single molecule biophysics
00:19:54;15 where you're looking at in vitro prepared samples
00:19:58;05 and you can anchor them to the glass to get a really good imaging of them.
00:20:02;24 Here's a relatively old image,
00:20:04;19 just demonstrating what TIRF does.
00:20:06;27 So here's an epifluorescence image of some cells
00:20:09;13 that have been induces to uptake FITC-dextran via endocytosis
00:20:13;12 and you can see these little puncti throughout the cells
00:20:15;25 particularly there are these little clusters inside the cells.
00:20:18;25 If we now switch to TIRF
00:20:22;18 you see that all that stuff on the interior of the cell disappears
00:20:25;09 and the signal, the noise really increases
00:20:27;25 we get much better contrast here.
00:20:29;17 These little specs on the background,
00:20:31;23 these little vesicles that are close to the cover slip
00:20:34;11 whereas all the stuff on the interior of the cell goes away.
00:20:37;04 So if you do happen to be looking at something
00:20:39;12 that can be made to be adjacent to the cover slip,
00:20:43;01 you know within a 100 nm to the cover slip,
00:20:44;28 TIRF is really the way to go.
00:20:49;17 So finally I wanna talk about some, you know 'trivial issues',
00:20:53;10 so these are trivial in a sense that they are, you know,
00:20:57;08 not really sample dependent and not complicated
00:21:00;04 but that doesn't mean they're not important.
00:21:02;15 In fact they're sort of critical
00:21:04;25 and so you know one of these trivial questions is
00:21:07;27 what laser lines and filter sets are available
00:21:10;04 on the scopes you have access to
00:21:12;02 and do they match you dyes.
00:21:13;07 So you know if you're trying to image,
00:21:15;07 say Cy5 and none of the microscopes you have has a Cy5 channel on it,
00:21:21;17 you're not gonna get very far.
00:21:23;01 Similarly if you're trying to do CFP-YFP FRET
00:21:25;22 and none of your scopes has a CFP-YFP filter cube on it
00:21:29;25 you are not gonna be able to do your experiment.
00:21:32;27 Particularly if you don't have access to wide range of microscopes,
00:21:35;29 critical question is what laser lines or filter sets are available?
00:21:40;08 Do they match the dyes you want
00:21:41;28 and if they don't can you switch your dyes
00:21:44;07 or can you get additional lasers or filter sets for your microscope?
00:21:50;15 And particularly if you're in a lab that doesn't have access
00:21:54;09 to a lot of microscopes it may be worth considering this up front
00:21:57;01 when you're planning an experiment
00:21:57;29 to see if you can design an experiment
00:22:00;11 that will work well with the scopes you have rather than you know have to spend extra money,
00:22:04;14 particularly if you're on a confocal and you need to buy extra laser lines.
00:22:07;19 This can be you know, tens of thousands of dollars to add them.
00:22:12;05 Similarly if you're doing live cell work,
00:22:14;07 do you have a microscope that can keep your cells alive?
00:22:17;04 Does it have a temperature, CO2 and humidity control?
00:22:21;15 You know, if you're doing mammalian cell work, you need all of these,
00:22:23;25 if you're doing other organisms you maybe just need temperature and humidity control
00:22:28;14 to keep your sample warm and keep it from evaporating.
00:22:32;14 But whether or not you have a microscope that can keep your sample happy
00:22:36;25 is also a critical issue here.
00:22:40;25 Also how fast can your microscope acquire images,
00:22:43;19 if you're trying to do video-rate imaging
00:22:46;23 of vesicle motion inside the cell or
00:22:51;01 cell migration or protein dynamics in the cell
00:22:53;25 and you only have a scope with the camera that can take images every half second
00:22:57;14 you know, this is really not gonna cut it.
00:23:00;27 This is again sort of an issue of technology
00:23:02;15 what technology is available to you and does it
00:23:04;24 meet the needs of your experiment?
00:23:08;21 And finally an issue that's come to the fore more recently
00:23:14;04 is the availability of hardware or software autofocus for long time-lapses.
00:23:20;12 If you're doing single images this doesn't really matter
00:23:23;10 but if you're trying to do an overnight time-lapse
00:23:28;00 most microscopes will drift out of focus over that time period
00:23:31;17 unless you either have an extremely stable,
00:23:34;06 very well temperature controlled environment for your microscope
00:23:37;22 or if you have some hardware or software technique
00:23:40;29 that will hold focus.
00:23:43;05 Most of the manufacturers now make a hardware system for autofocus.
00:23:46;20 Those are really nice because they don't require
00:23:49;09 very much intervention on your part;
00:23:51;08 they track something like the coverslip of your sample
00:23:53;26 or some other feature inside the sample
00:23:56;12 in hardware in feedback to hold focus.
00:24:00;09 If you have one of those it makes doing long time-lapse much, much easier.
00:24:04;23 If you don't there are software options
00:24:06;19 which are generally image-based where you use
00:24:08;25 a computer system to take photos of your sample
00:24:13;06 at different focal planes and then
00:24:15;17 it evaluates which one is in the best focus
00:24:18;12 and will adjust the focus to hold that
00:24:20;20 in the center of your image.
00:24:24;04 That is not quite as ideal as the hardware system
00:24:26;10 partly because it is slower and partly because it exposes your samples to more light
00:24:30;06 which tends to lead to phototoxicity,
00:24:32;26 but is still better than having your sample drift out of focus
00:24:35;23 during the course of your experiment.
00:24:38;16 So these are all sort of hardware issues that you should consider
00:24:40;24 when setting up your experiment, as to whether you have access to the
00:24:44;22 hardware that is going to either make your experiment possible or make it easier.
00:24:52;05 Another big set of issues is sample preparation.
00:24:56;03 This is really a much larger topic
00:24:57;25 than I can cover in this one lecture here.
00:25:00;19 But just to highlight some of the critical issues here.
00:25:04;01 You know, if you're doing fixed samples
00:25:08;00 does your fixation and mounting procedure preserve the localization of your protein?
00:25:14;16 So there are bunch of different ways you can fix samples,
00:25:16;23 there are bunch of different ways you can mount them
00:25:19;05 and it is not guaranteed that fixing with formaldehyde
00:25:23;19 will preserve the localization of your protein.
00:25:27;00 Similarly if you're doing GFP tagging or fluorescent protein tagging
00:25:30;14 it is not guaranteed that your fluorescently tagged protein
00:25:33;26 will behave the same as the native protein
00:25:36;22 and so it’s often best if you can use both techniques to look at your protein
00:25:41;18 to rule out that one or the other is introducing artifacts.
00:25:47;09 And another issue for sample preparation is if you're doing
00:25:50;02 fixed specimens that are thick you know
00:25:52;05 100 micron brain sections or similar types of preparations
00:25:57;22 you want to consider something called 'clearing'
00:25:59;06 and this is generally passaging your samples through some solution
00:26:03;09 which can either be something like zyoline or benzyl alcohol
00:26:08;05 that dissolves out lipids or these newer
00:26:11;10 reagents like the scale system from Nowacki's lab
00:26:14;08 and what these are chemical treatments of your sample
00:26:16;22 that reduces the light scattering and the opaqueness of the sample
00:26:20;10 and makes it much clearer and easier to image into it, into a fixed specimen.
00:26:26;25 And this can really make the difference between being able to image
00:26:29;29 just 20 or 30 microns into a sample and being able to image 100 or 200.
00:26:34;20 So this sort of goes along with fixing or mounting
00:26:39;21 but is definitely worth considering for fixed specimens,
00:26:44;26 obviously these techniques are not applicable to live specimens.
00:26:51;02 Another issues which I touched upon a little bit is dye choices.
00:26:55;15 For fixed samples a very common filter set is this
00:26:58;19 quadruple dye set this so called quad set
00:27:03;21 which would do DAPI, fluorescein, Cy3 or rhodamine and then Cy5.
00:27:09;13 And there are a number of different dyes out there;
00:27:11;26 there are many different dyes out there that will work with a set like this.
00:27:15;23 Obviously in your DAPI channel there is there's DAPI and Hoechst dyes,
00:27:18;12 there's also thee Alexa dyes
00:27:19;27 there's some newer dyes that also fall into this channel
00:27:22;18 for doing antibody labeling
00:27:25;14 In green channel you pretty much never wanna use fluorescein.
00:27:27;26 It is a very old dye, it photobleaches rapidly.
00:27:31;04 Something like Alexa48 is much better.
00:27:33;14 There are probably equally good dyes from other companies now.
00:27:37;22 In the red channel you can use rhodamine or Alexa546 or 568.
00:27:43;15 And in the far red channel you have Cy5, Alexa647 or Ado647 dye.
00:27:49;07 You can do more than four colors,
00:27:53;22 but it is challenging still on most microscopes
00:27:57;17 so for routine imaging it is certainly the easiest
00:27:59;13 if you can design your experiment only in need four dyes.
00:28:02;26 It is absolutely possible to do more than four
00:28:04;20 but it may require some special hardware
00:28:07;24 or thinking a lot about your data analysis procedures to make sure there is no cross talk.
00:28:14;02 On the fluorescent protein side
00:28:16;25 you can use a very similar set for live cell imaging now
00:28:20;10 and you can use blue fluorescent protein or green fluorescent protein
00:28:23;21 or red fluorescent protein and then an infrared fluorescent protein.
00:28:26;27 And what is sort of seen to be the best right now
00:28:32;01 is things like mTagBFP2 in the blue fluorescent protein channel.
00:28:38;12 This is a very new variant of mTagBFP which is also quite good.
00:28:43;01 For GFP you have the old stain by EGFP which is very good,
00:28:47;07 some more modern versions like emerald.
00:28:51;09 For the red there is mCherry sort of standby,
00:28:54;23 newer things like TagRFP may be better.
00:28:57;19 There are a lot of RFP variants out there
00:28:59;23 and it is not completely clear right now which one is best.
00:29:02;24 And most recently there are now
00:29:04;21 infrared fluorescent proteins
00:29:07;01 that work in the Cy5 channel.
00:29:09;22 So there's this protein iFP1.4 and a newer one called iRFP.
00:29:15;05 These actually use a co-factor to
00:29:17;06 generate fluorescence so they're a little trickier to work with
00:29:19;11 than the three up here, but are still a good choice for
00:29:23;20 live cell imaging and I know a number people doing
00:29:25;28 this kind of four-color imaging routinely in live cells.
00:29:32;13 Couple of other points to make.
00:29:35;08 So we could talk a lot about noise and resolution
00:29:40;15 and I don't wanna go into technical details here
00:29:44;00 but just wanna say that high resolution imaging
00:29:47;08 as well as precise quantitation,
00:29:49;10 basically any place where you're trying to make very
00:29:50;19 accurate intensity measurements require a lot of light.
00:29:54;25 So you need very bright images to reduce
00:29:57;27 the photon shot noise in your image to a point
00:30:01;13 where you can get both high resolution and precise quantitation in your image.
00:30:05;10 And this means that either your samples need to be very bright intrinsically
00:30:08;22 or if they're not very bright you're gonna need to use long exposures.
00:30:12;00 And if you are in this regime where you need to use long exposures
00:30:15;04 you need to worry about problems of photobleaching and phototoxicity.
00:30:20;04 So if you're doing a Z-stack in a fixed sample
00:30:23;05 and you find that your fluorescence is kind of gone
00:30:26;01 by the time you get all the way through it
00:30:27;06 because you bleached it all that's a problem.
00:30:29;23 Similarly if your cells are dying due to light exposure
00:30:31;24 over the time course of your experiment that's a problem as well.
00:30:37;19 They’re no magic bullets here though are pretty good for fixed samples,
00:30:41;15 mounting media that will reduce photobleaching.
00:30:44;08 For live cells there's many fewer things you can do
00:30:46;03 although there are some reports of additives
00:30:48;05 you can add to cell culture to reduce photobleaching,
00:30:51;14 but in general the only solution here is just to reduce
00:30:53;23 the amount of light that you're exposing your samples to.
00:30:57;13 So there are potential trade-offs here between
00:31:00;16 precision, speed, photobleaching
00:31:03;22 and also for how long you can image for.
00:31:06;09 So if you're trying to image very fast
00:31:09;01 you can't use long exposures.
00:31:11;13 If you're trying to get very precise images you may need a lot of light
00:31:14;00 which will prevent you from going fast
00:31:15;22 and may also lead to photobleaching problems
00:31:18;01 which will prevent you from imaging as long as you like say.
00:31:22;06 So this is just a thing to be aware of.
00:31:25;03 If you're trying to image, you know, a video array
00:31:26;29 for overnight it’s probably not going to work
00:31:29;09 just because of the amount of light you're gonna have to expose your cells to,
00:31:32;19 whereas if you're trying to image every half-hour
00:31:34;20 overnight then you'll probably have much better luck
00:31:37;13 in not killing your cells with light you're shining on them.
00:31:41;24 So, you know not everything you wanna do may be possible.
00:31:44;11 You may run into fundamental limitations
00:31:46;14 that prevent you from getting the data you want.
00:31:50;07 Finally I'd say, you know, nothing beats good data.
00:31:55;11 This is, you know something to think about
00:31:58;06 and you know, really means you should think about what data you need
00:32:01;18 before you take it
00:32:03;15 and if you're taking video-rate data just because you can
00:32:09;18 but you don't really need that time resolution
00:32:11;10 and because you're shining all this light on your cells
00:32:14;05 you're getting photobleaching and phototoxicity issues
00:32:16;15 that's reducing to say the accuracy of your data,
00:32:19;10 that doesn't really help you.
00:32:21;26 So you really wanna think about
00:32:23;17 what the data you need before you take it
00:32:25;16 and, you know not take data that is unnecessary in some way
00:32:29;06 and may compromise the things you really care about.
00:32:32;12 So you know, you should think about if you need time resolution.
00:32:34;24 Do you need high speed,
00:32:35;24 do you need high spatial resolution,
00:32:37;23 do you need high intensity resolution,
00:32:39;20 the ability to do precise intensity quantification?
00:32:43;20 Also things like, do you need day-to-day reproducibility?
00:32:46;17 Are you gonna be trying to compare samples,
00:32:48;29 the intensity of samples from one day to the next,
00:32:51;28 maybe you know, from different experimental batches
00:32:54;27 or different, lots of mice or something.
00:32:58;02 And some way do you need spatial uniformity?
00:33:03;26 And particularly these last two.
00:33:04;19 If you need something like day-to -day reproducibility
00:33:06;11 you're going to need to think a lot about including appropriate controls
00:33:10;00 and internal standards in your imaging procedure
00:33:12;13 to compensate or measure any variations in the intensity
00:33:18;20 of the microscope so things like lamp intensity and camera sensitivity
00:33:22;18 will drift over time and if you don't a have way to
00:33:25;26 accurately measure that and correct for it,
00:33:29;14 you're going to have much worse day-to-day reproducibility
00:33:32;12 than if you include those kinds of controls.
00:33:35;18 And so you can fix a lot of these things in post-processing.
00:33:38;26 You can take data that's not perfect
00:33:40;20 and work out ways to figure out these corrections after the fact.
00:33:44;03 But your data will almost always be better
00:33:46;09 if you put the work in ahead of time to think about how to collect your data best
00:33:50;22 and you know what kinds of controls you need to include
00:33:53;19 and which things you care about
00:33:55;10 and design your experiments to
00:33:57;14 maximize the things you care about.
00:34:02;29 Saying that goes along with that
00:34:04;10 is what I always tell people,
00:34:05;27 if you know if you care about something enough to worry about it
00:34:08;19 you should figure out how you can measure it.
00:34:11;12 So I often see people asking me:
00:34:14;15 Oh, you see the intensity uniform across the field of view of this microscope
00:34:18;09 you know, can I accurately compare a cell
00:34:20;12 in the lower right corner to one that's on the upper left corner
00:34:23;19 or they can have different brightness.
00:34:26;08 And you know my answer is often
00:34:27;21 well I can tell you what I think but if this is really important to you,
00:34:30;09 you should measure it
00:34:32;13 because what I know may be out of date or not accurate.
00:34:37;13 Two general things, so in general
00:34:41;06 microscopes are not uniform over the field of view.
00:34:43;29 Both, the illumination intensity and detection efficiency
00:34:46;11 are not uniform over the field of view of the microscope.
00:34:49;25 These can be measured and corrected
00:34:51;24 by looking at uniform fluorescent sample.
00:34:54;01 Something like a fluorescent plastic slide or a uniform solution of dye.
00:34:59;27 So there are ways to measure these things
00:35:01;26 in correct form and if this is important to you,
00:35:05;03 you should measure them and correct for them.
00:35:07;13 One caveat here is that if there's photobleaching in your sample,
00:35:10;09 this may not be so trivial.
00:35:12;25 So bare that in mind.
00:35:15;19 And similarly temporal uniformity,
00:35:18;03 so things like lamp power, laser power,
00:35:21;13 the alignment of your lamp and your laser, they're gonna fluctuate
00:35:23;29 from day-to-day and that means
00:35:26;19 the amount of light reaching your sample will fluctuate from day-to-day.
00:35:29;11 This can be a 10 or 20% effect.
00:35:31;10 It is not gigantic, but it is not small.
00:35:34;10 Over the course of months this can be more like a twofold effect.
00:35:38;12 You know we often see there are
00:35:40;00 lasers on our spinning disc confocal drift out of the alignment
00:35:42;16 over months and when we realign them, the power goes up by twofold.
00:35:45;11 So you shouldn't rely on these things being stable
00:35:48;09 from day-to-day if that's important to you.
00:35:50;10 You should include in your experiment
00:35:51;28 some kind of control samples
00:35:53;20 that will let you assess how bright the microscope is in that experimental session.
00:35:59;00 So you can measure this,
00:36:00;22 but of course you'll get the best data if you
00:36:02;24 do all your experiments on the same day in the same session.
00:36:05;18 That's not always possible
00:36:07;10 so that's when you wanna include an internal control
00:36:09;07 that lets you measure that and assess it.
00:36:14;09 There are other sorts of things like this
00:36:15;25 but these are probably the two major sources
00:36:17;22 of non-uniformity you wanna think about.
00:36:21;25 So that's all I have to say today,
00:36:23;01 I just wanted to, hopefully I've shed some light on
00:36:26;03 kinds of things you wanna think about
00:36:27;13 when designing microscope experiment and given you some
00:36:30;14 bulk park ideas as to how to choose a microscope.
00:36:34;05 Thank you!
00:36:36;16

This Talk
Speaker: Kurt Thorn
Audience:
  • Researcher
Recorded: April 2012
More Talks in Microscopy Series
  • Labeling Proteins with Fluorescent Probes (Timothy Mitchison)
    Labeling Proteins with Fluorescent Probes
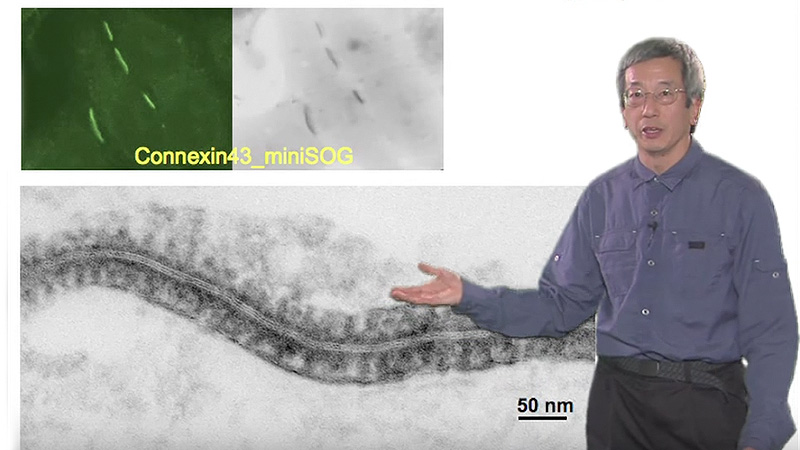
  • Correlating Fluorescence With Electron Microscopy Roger Tsien
    Correlating Fluorescence with Electron Microscopy
  • Steven Chu
    Pushing the Boundaries of Light Microscopy
All Talks in Microscopy Series
Share

Talk Overview

With all the microscopy techniques now available, which one should you use for your experiment? Here we describe some considerations to take into account when designing a microscopy experiment including: choice of microscope, choice of dye or fluorescent protein, and using confocal, TIRF, or widefield.

Questions

  1. You would like to obtain a high-resolution image on a thin, 10 µm sample. Which of the following statement(s) is true? (Select all that apply)
    1. Using a confocal over a widefield microscope will increase the resolution of the image
    2. Using a high NA over a low NA will increase the image resolution
    3. Using a spinning disk confocal over a laser-scanning confocal will be preferable if this is a live sample
    4. None of the above
  2. In his talk, Dr. Thorn explains that the resolution of an image can be calculated based on the following mathematical formula: dmin = 0.61 λ/ N.A. Would you agree or disagree with the following statement: “The higher the NA, the higher the image resolution.” Explain why.
  3. You are in charge of the microscopy facility at your institution. An investigator comes to you and explains that, after several months of research, she finally identified a lab which has a transgenic mouse colony expressing mCherry fusion proteins for the gene she is researching. mCherry is a monomeric red fluorescent protein (RFP) that is excited with a 561 nm yellow-green laser. However, you do not have this laser line at your facility. Should you recommend that this investigator not move forward with her study until she finds transgenic mice that match the laser lines available at your facility? Explain your answer.
  4. You are in the process of designing an experiment which will involve long-term, high-resolution 3D live cell imaging on a 10 µm sample, and involving fusion proteins with mCherry. List 3 pieces of equipment that you will need to check for before you begin your study.
  5. In the list below, choose the steps that could improve data analysis in the long run:
    1. Using fewer than 4 dyes at onc
    2. Determining whether protein localization is impacted by fixing, mounting or labeling prior to beginning your study
    3. Reducing the amount of light to which you are exposing your samples
    4. Including controls that will correct for variations during data collection
    5. None of the above

Answers

View Answers
  1. B, C
    1. Incorrect – Using a confocal microscope will NOT increase the resolution of the image.
    2. Correct – Using a high NA over a low NA will increase the XY resolution.
    3. Correct – Using a spinning disk confocal over a laser-scanning confocal will be preferable if this is a live sample because
  2. Agree. dmin stands for the smallest distance separating two distinct objects. A high resolution image allows one to distinguish between two objects that are very close together, and therefore a high resolution image will have a low dmin. Therefore, the higher the NA, the lower the dmin, and therefore the higher the resolution.
  3. In his talk, Dr. Thorn explains that he recommends checking that the dyes used when labeling samples match the laser lines available at the design stage, before launching an experiment. However, he does explain that in certain conditions, such as with fusion protein constructs in transgenic mice, the availability of laser lines cannot be taken into account. In this case, the investigator should probably look for the right microscope or look into buying a laser line for an existing microscope at her or other institutions so she can complete her study.
  4. i) A spinning disk confocal to rapidly image a thin, live specimen;

    ii) An environmental chamber, which is used for live cell work. It allows the investigator to control for temperature, CO2 levels, and humidity to keep the specimen alive during image recording;

    iii) The appropriate laser line for mCherry (in this case, 561 nm yellow-green laser)

  5. A, B, C, D
    1. Correct: Using more than 4 dyes at once may result in crossover in light detection.
    2. Correct: Protein localization can occasionally be impacted by fixing, mounting or labeling, so it is important to determine if they do prior to beginning your study.
    3. Correct: Reducing the amount of light to which you are exposing your samples will avoid (or lessen) photobleaching and phototoxicity issues.
    4. Correct: Including the right controls will allow to correct for day-to-day variations during data collection (due to lamp power and alignment, for example)

Speaker Bio

Kurt Thorn

Kurt Thorn

Kurt Thorn is an Assistant Professor of Biochemistry and Biophysics at UCSF and Director of the Nikon Imaging Center – a facility that provides cutting edge light microscopy equipment to UCSF researchers. Kurt can be followed on his blog at http://nic.ucsf.edu/blog/. Continue Reading
Playlist: Microscopy Series

  • Philippe Bastiaens Fluorescence Lifetime Imaging Microscopy
    Fluorescence Lifetime Imaging Microscopy
  • Labeling Proteins with Fluorescent Probes (Timothy Mitchison)
    Labeling Proteins with Fluorescent Probes
  • Correlating Fluorescence With Electron Microscopy Roger Tsien
    Correlating Fluorescence with Electron Microscopy
  • Steven Chu
    Pushing the Boundaries of Light Microscopy

Reader Interactions

Leave a Reply Cancel reply

Your email address will not be published. Required fields are marked *

Primary Sidebar

Like our Website?

You'll love our newsletter...

  • Sign up for:
    • Exclusive iBiology content
    • 10 Must See Biology Videos
    • Talks by 20+ Nobel Winners
    • Our young Scientist Survival Toolkit
    • Talks by trailblazing Women in Biology
    • Updates on exciting iBiology projects in development
    Tyler Allen
  • This field is for validation purposes and should be left unchanged.

Privacy Policy

Help us keep bringing the world’s best biology to you!

Footer

Funders

NSF Logo
Lasker Logo
NIGMS Logo

Partners

Start Here

  • Talks for Everyone
  • Talks for Students
  • Talks for Research
  • Talks for Educators

Explore

  • Explore
  • All Playlists
  • All Speakers
  • All Talks

Talks By Topic

  • Biochemistry
  • Bioengineering
  • Biophysics
  • Cell Biology
  • Development and Stem Cells
  • Ecology
  • Genetics and Gene Regulation
  • Human Disease
  • Immunology
  • Microbiology
  • Neuroscience
  • Plant Biology
  • Techniques

Talks by Series

  • Bench to Bedside
  • Famous Discoveries
  • Great Questions
  • Share Your Research Series

Career

  • Professional Development
  • Career Exploration
  • NRMN Resources
  • Biomedical Workforce

Courses

  • Microscopy Series
  • Short Microscopy Series
  • Open edX Courses
  • Cell Biology Flipped Course
  • Engineering Life Flipped Course
  • Evolution Flipped Course

Educator

  • Educator Registration
  • Educator Resources
  • Log In

About Us

  • About Us
  • iBiology Team
  • Wonder Collaborative
  • Contact Us
  • Make a Donation
  • Mission
  • Privacy Policy

This material is based upon work supported by the National Science Foundation and the National Institute of General Medical Sciences under Grant No. MCB-1052331. Any opinion, finding, conclusion, or recommendation expressed in these videos are solely those of the speaker and do not necessarily represent the views of iBiology, the National Science Foundation, the National Institutes of Health, or other iBiology funders.

© 2021 - 2006 iBiology · All content under CC BY-NC-ND 3.0 license · Privacy Policy · Terms of Use · Usage Policy
 

Power by iBiology